-
Creating mystery & intrigue with Timber Walls, Fences & Trelliage
Last time we talked about paths.
Today I thought it might be advantageous to discuss ‘Timber Walls & Fences’.
We will include Trelliage as they all have a role to play.
Helping to create a certain kind of mystery within a garden landscape.
We’ve discussed hedges recently, so you can scroll down to that article if you would like.
These ‘vertical materials’ are acting as a visual or physical barrier between differing areas.
This leads the eye on to a new discovery or perhaps just creating an interesting space.
At some time fairly soon we should add ‘Green Walls’ which are gaining in interest and can look absolutely superb.
I wonder how long it is before we develop these to grow vertical edibles ?
Having designed and built a huge number of gardens over the years. We have gained valuable experience in what works best in a given situation.
Using Timber.
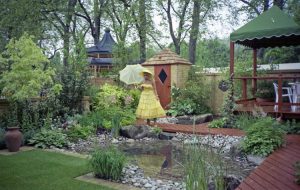
The garden below, was primarily designed to reduce aftercare. Taking care to keep the beautifully rustic boundary fencing, which blends in to both the surroundings and the new work so well.
It was necessary, to repair the odd arris rail, a couple of fence posts and some slats, re-hang the side gate etc. Overall by keeping the original fence the rustic feel was, I think, you will agree maintained.

Low hit and miss side fence with 6ft feather edged boundary fence & framed gate Start with what is already there.
It’s nearly always best to work with what is already there, rather than ripping out everything. My first task is always to look up and see how the tree canopy is. Then beyond the space we are working with.
To see what impact, we may be making without perhaps realizing how a neighbor might view our endeavors.

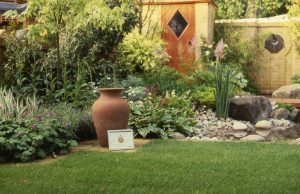
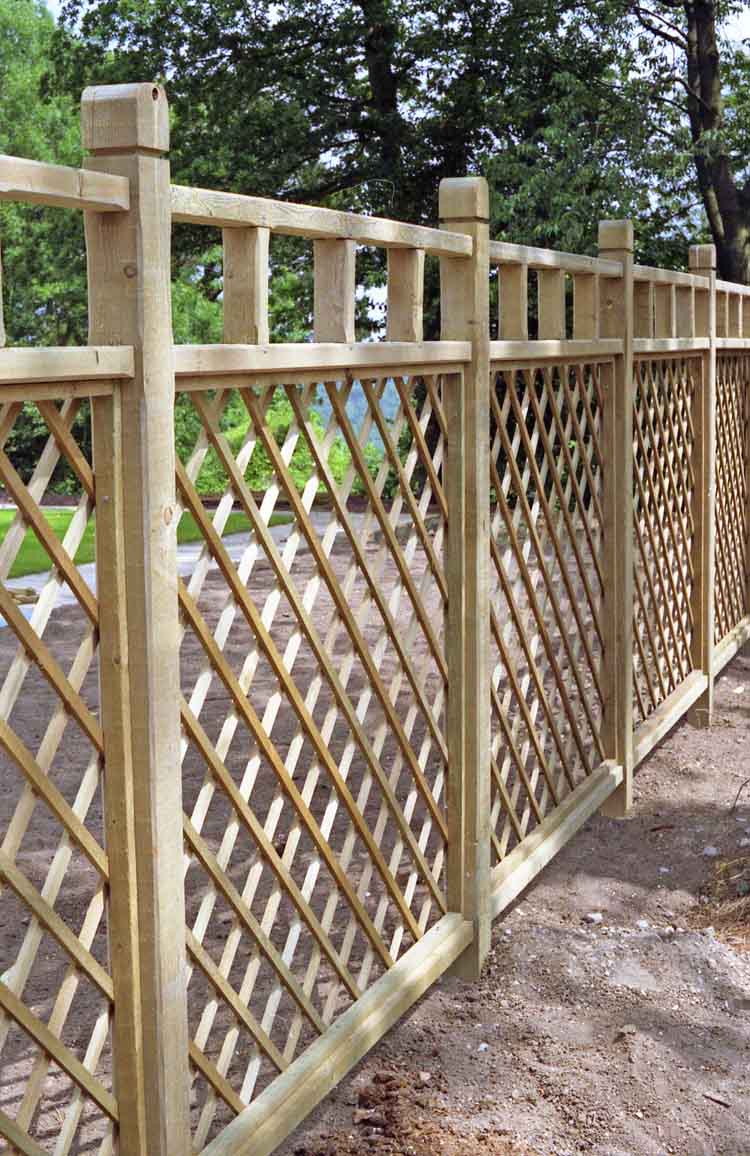
Very low maintenance, Mediterranean style In small gardens complete barriers tend to make the garden smaller. It is best to create more of an illusion of a barrier. This is often best created by using trellis. Here is an example that we stained black.
A word of warning, trying to make a gate from trellis is fraught with problems if you do not add a full frame that is braced. When you add this, it tends to upset the look of the trellis, so think carefully before using as a gate. As without the frame the gate will change shape over time!
Trelliage
The trellis here was primarily to separate the more formal ‘Front Garden’ with the more relaxed ‘Play Garden’ at the rear and side of the property.

To improve the strength of this gate we added metal framing at each corner, both inside and outside, it was only partially successful.

A black stained trellis gate If a more substantial barrier is required, say in the form of a structural wall to hold back a bank then there are a number of ways to achieve this.
Low Timber Retaining wall.
Here we used vertically set timber as a retaining wall. We did place a waterproof membrane behind the timber and a gravel pressure release drain. So as not to have unsightly stains running across the light colored paving.

Low timber retaining wall A quite pleasing effect can be achieved.

The softer low timber wall looks at home here. Roof Gardens
Roof gardens benefit from the light weight of timber. Its ability to be ‘modulised’, as can be seen here.

Low timber walls on roof garden Structural Timber Walls
Some years ago, now, we discovered. Well perhaps I should say a local native of our area wanted someone to test a new product he had found lurking in New Zealand. So, as we had won a number of awards for our work, and our teams were well known, he persuaded us to try this product.

Structural Timber Walls It was fantastic. Ok I should add some provisos, it is treated wood, it lasts a very long time, I have pieces from 30 years ago that are still unblemished. Maybe bleached a little but otherwise fine. It will twist if not constructed correctly, although it is unzippable and thus fairly straightforward to repair. If you introduce plants into the wall, it looks amazing. Infact the plants protect the timber.
Here’s a much taller one we completed.
It is essential to use a structural engineer to carry out the necessary survey, and calculate the design criteria for these ‘Gravity Walls.’

Once established they can look like this..

Planting covering a timber wall 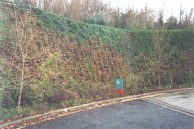
The timber wall blends in so well Some years back we were even asked to build a play area within a timber stockade. The posts were about 16 ft long and required some ingenuity to place correctly.

Treated timber barrier in play area Here’s how we did it..

Using a 4in1 bucket on a bobcat Moving to more decorative uses, let’s explore trelliage and low walls..

Wishing well feature with trellis back drop We sometimes add some whimsy to our designs. Here we used a rather deep drainage shaft, disguising it as a wishing well. To make it stand out we added a trellis surround to enable us to plant climbers to enhance the visual impact. Here its just been completed.

Pergola with Wishing Well at end of path Ornamental Trelliage
Here we used a cloud trellis to add some movement to the landscape. To help hide the boring stepped trellis in the neighboring garden.

Cloud trellis adds movement Here the trellis has been painted white next to the house it gives a very clean look.

Painting trellis white adds interest Here we had a custom-made heavy-duty trellis, note the pencil edges soften the whole fence.

Superb detail for trellis 
The completed trellis barrier Ann & I will spend a little time on the radio show talking about materials. When we interview our next guests who will be Designers.
In the meantime, do come and listen at Growing Trends
We would love to hear from you with ideas, comments, suggestions and requests…
Ann & Chris
Views: 308
-
Some unusual moments – while designing & constructing landscape projects
Unusual moments from the past 50 years.
I’ve been really fortunate during much of my working years.
Meeting famous people,
Visiting simply amazing homes.
Helping Buy & Sell some truly amazing homes
Designing & building some fabulous landscape projects all over the world.
A big thank you.
First though, a really big thank you.
To all my incredible staff during all this time. I could not have done any of it without their help and encouragement.
I was indeed fortunate to employ some highly skilled, extremely talented, great folks.
During these, many years.
The team was rewarded with a huge number of awards for our work. – 17 National Awards, and 3 Chelsea Flower Show Awards.
Here are a few of the prestigious ones that came with extremely unusual moments:
Now in no particular order, more, just how I recollected them are some of those events.
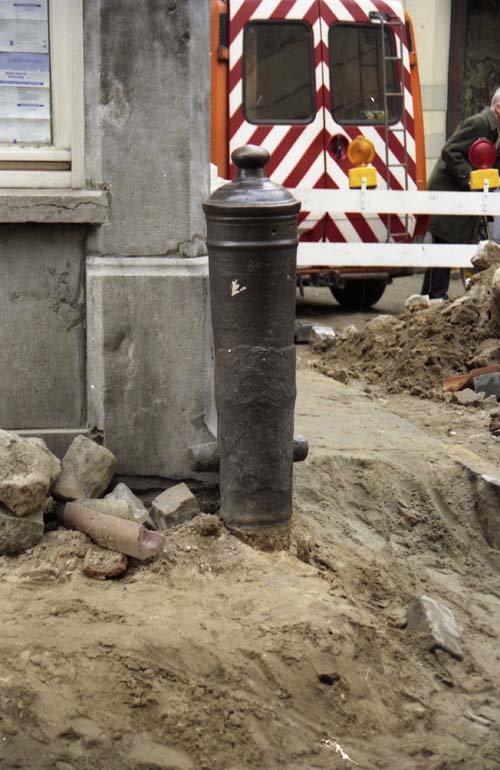
The Tower of London
Here a straightforward design and install for an irrigation system, we were the first Toro residential dealer in London.
The irrigation systems were for the Moat & the Queen’s terrace. (that’s just outside where you queue to go in to see the Crown Jewels).
We were not allowed to cut into any of the building’s fabric, or into the stonework. In addition, we had to find a place to hide an 800-gallon water tank with a pump along with all the switching gear. This had to be accessible for future maintenance.
Once the design was completed. There followed the setting out of the irrigation lines.
These were completed and trenching begun.
A Collection of Bones
We had just started to trench the main lines when suddenly we exposed a collection of bones – human bones.
When this happens it’s extremely wise to contact a few people you might not otherwise know.
In no particular order, they were the facility manager (they have a wonderful name at the Tower for this person – The Keeper of the Keys), the coroner is next, and then the local constabulary.
Although it was very doubtful that this was indeed nefarious unless the bones were very old!
They turned out to be the remains of a priest. Who had been a chaplain and was buried there in the mid 20th century.
Then everyone sort of forgot where he had been laid to rest.
As the area was close to the infamous ‘Block’ we had to wait until everyone had left.
We rather gingerly, and carefully gathered what remains we could together.
There followed a quiet re-consecration service.

A New Power Station by the River Thames.
A tad more mundane. Having just completed a large ‘cut & fill’ project, covering many acres.
The area was the setting out ground for the entire power station project.
All the metalwork for the project was stored on this area during construction for the new power station.
Just as we prepared one area, about 30 acres for seeding.
A military land rover pulled up, out jumped an officer and team from the bomb squad. I kid you not !
They had been alerted by an old lady across the way (about 1/4mile).
She had just recalled (after almost 35 years), that a flight of German bombers, had dropped their loads of bombs.
Just where we were working during the War.
Some of which had failed to explode…!

So the ‘sappers’, were obliged to dig around for a few days, messing up our seedbed as you can see. T
hey failed to find anything and left.
Some ten years later, whilst preparing for the new Queen Elizabeth Dartford bridge, 15 or so unexploded bombs were indeed found in the hedgerow not 70ft from where the bomb squad had poked around and we had adjusted the levels by 3ft !!!
Only in the USA… well maybe not!
I was called over to the USA to visit a huge private estate.
Moving truly huge trees
It was to see if we would like to be involved in a project involving large rocks and trees.
A very wealthy gentleman was in a hurry to complete a fully mature landscape – he’d been working on the project for about 10 years, so it probably wasn’t that much of a hurry.
When I arrived he was indeed pushing the landscape construction boundaries.

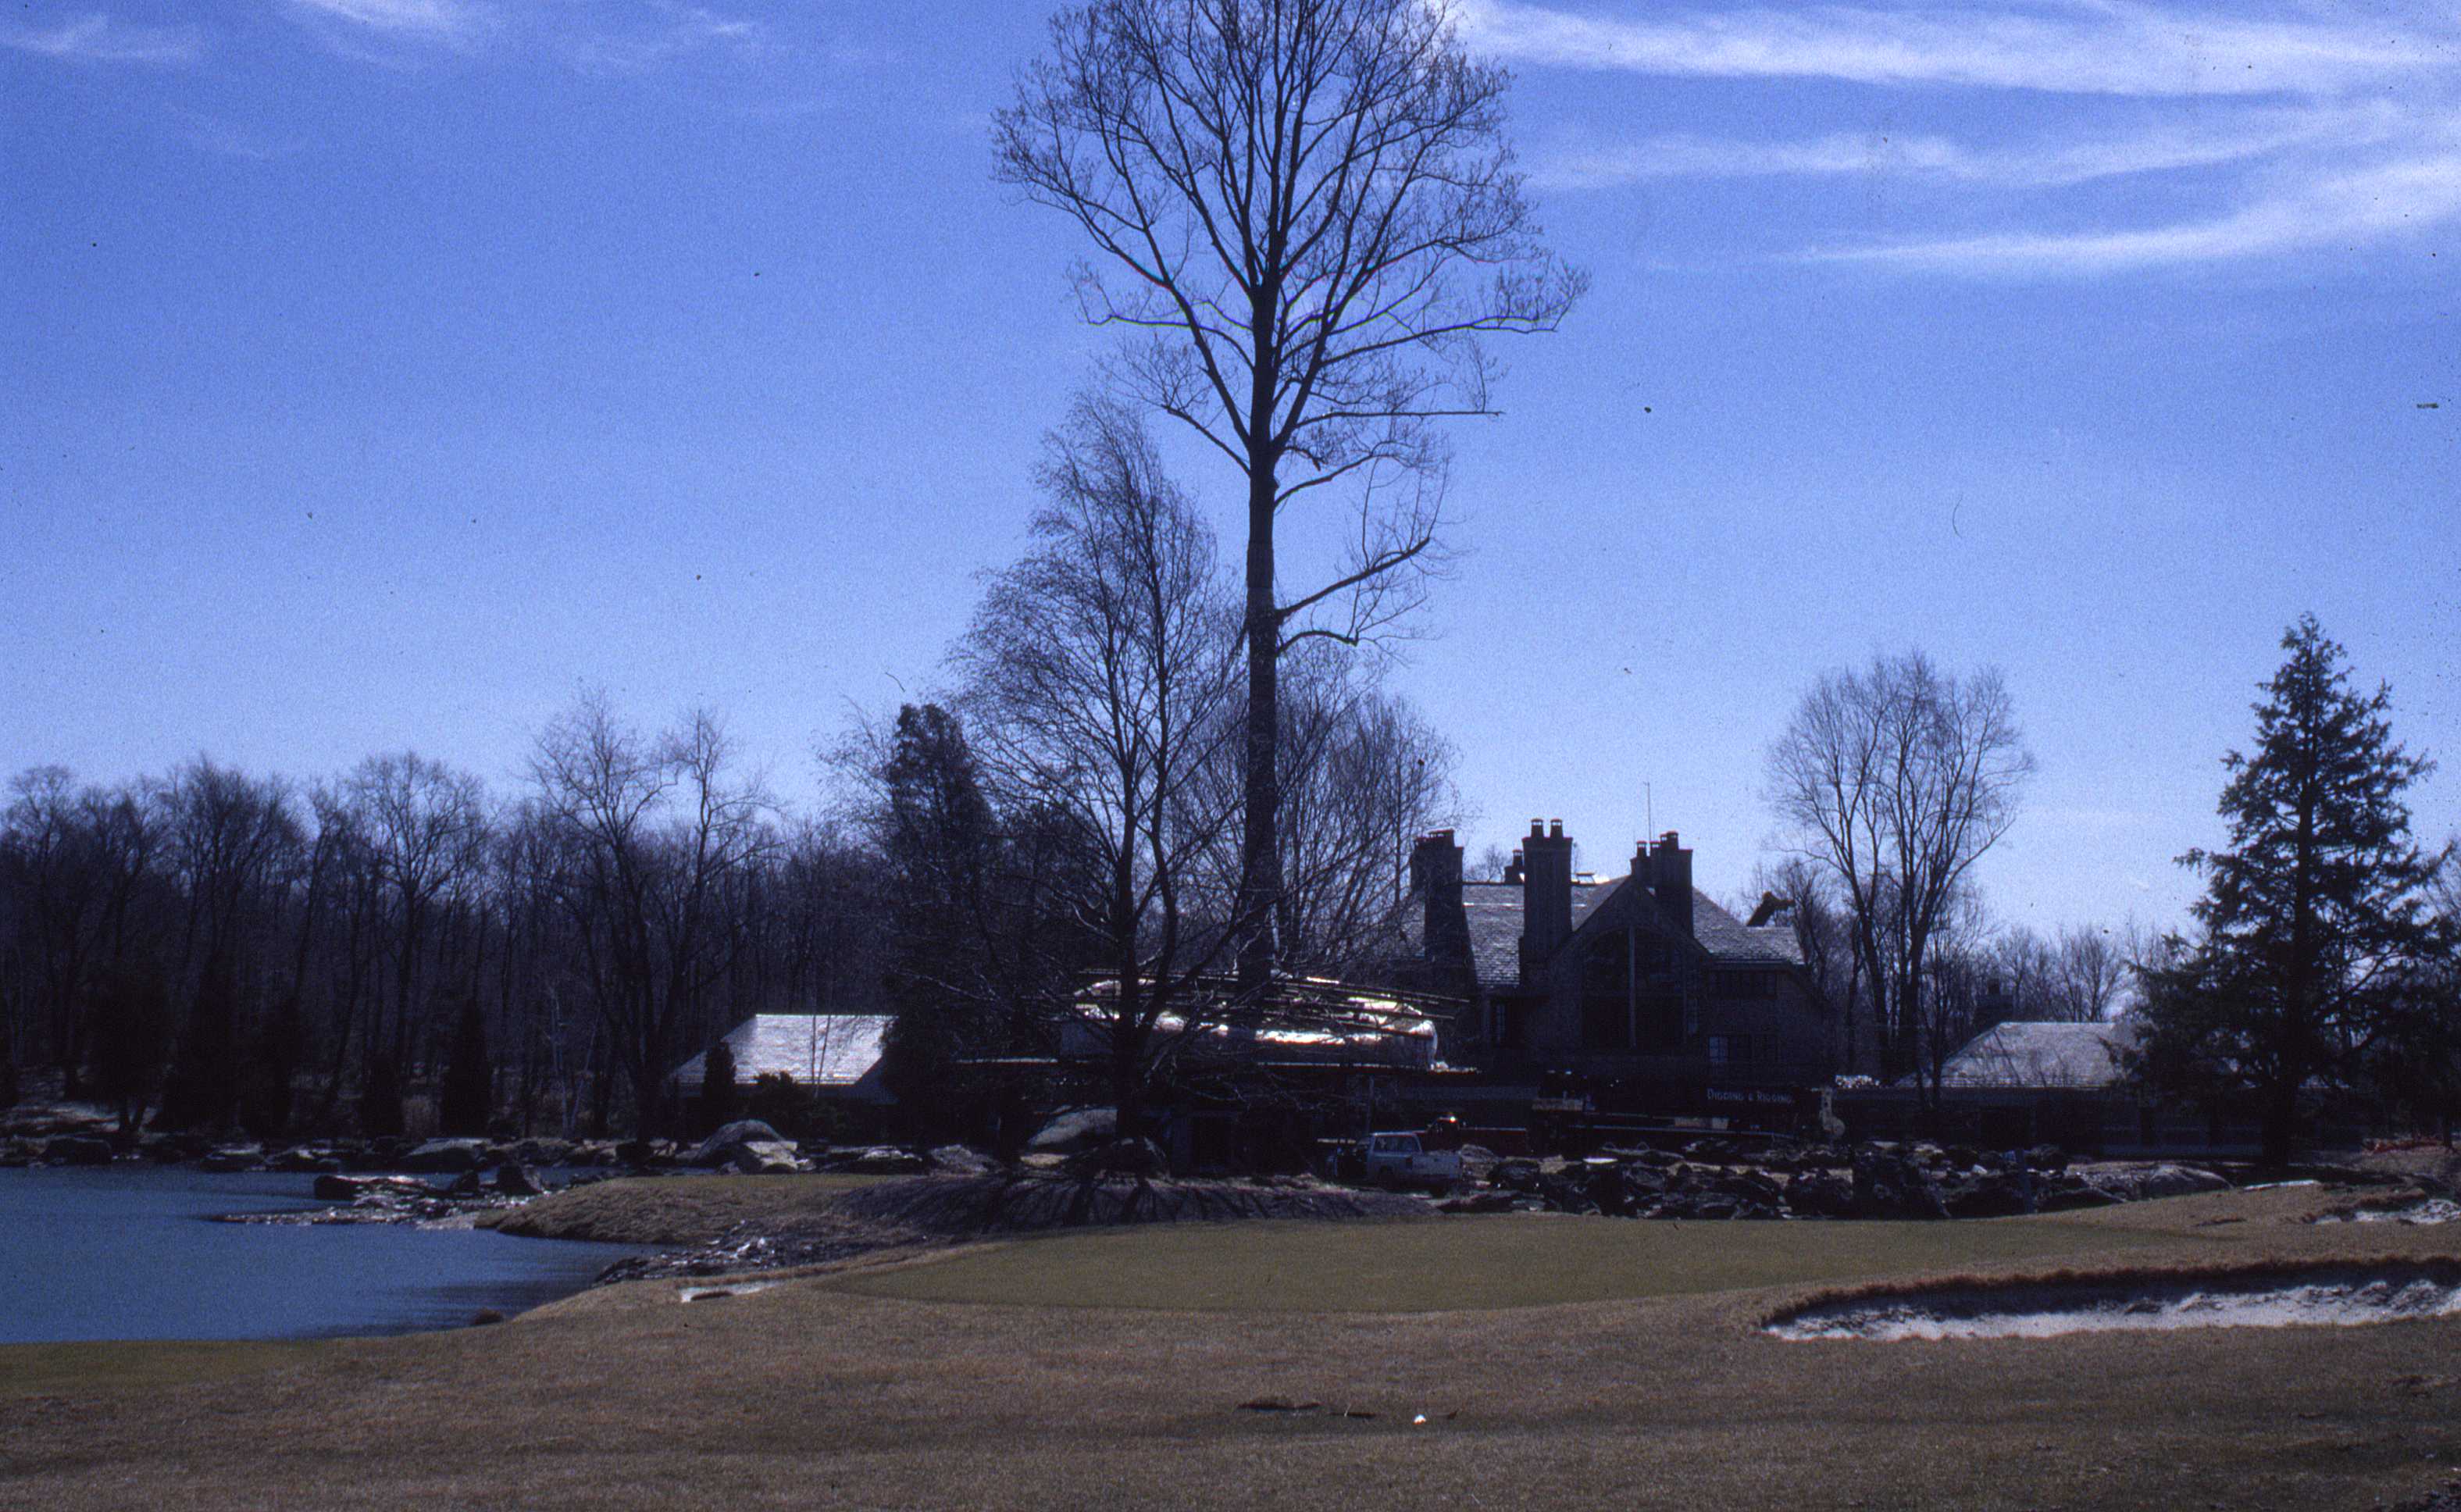
This tree was about 600 tons in weight. Perched at least 15ft in the air. The “hardwood stacked columns” were due to stay in place.
Then then the ground would be backfilled with soil. Irrigation would extend into the tree to a height of 40ft for a number of years, to assist with establishment.
As we approached, the site manager, who I was traveling with, was asked by the foreman.
If the position of this tree was ‘OK’. He was asked how far off the angle was – you can see the tilting in the hessian covering the rootball.
The reply – “about 6 inches” The site manager then said, “no it had to be closer.”
This one comment made me think that this project was due to be ongoing for a long time, one to avoid.
Here’s a picture of an even bigger tree moving down the road on the same site……
It took about 2 years to prepare each tree for lifting. We actually drove underneath this monster in a Ford F250.

I know what fun……..
Lambeth, South London
Back in the days when unrest descended on London. (A polite euphemism for Riots in about 1980).
We had an unusual project in Lambeth. – An area that had been called ‘The Peoples Democratic Republic of Lambeth – by it’s then ultra left-leaning leader ‘Red Ted’ Knight)
It was to be a children’s play area with a huge wooden stockade,(long gone I suspect).
As you can see from the picture the logs were huge some 16ft tall and at least 10-inch diameter.
All pressure treated so they would last a long time.
A small scuffle
They had just been delivered to the site when there was a particularly vigorous riot.
Cars were turned over and set alight, windows smashed, the police station attacked, that sort of thing.
I was comfortably at home watching it all on television when my insurance broker called me in a panic at 7 am to ask how things were.
Then he told me he forgot to put my logs (those 16ft monsters) on ‘All risk” as I had requested the day before.
It’s funny how you get to hear about these sort of events if you engage the locals.
Later that day I did go and visit the site.
All was perfectly fine, apart from 4 or five burned-out cars in the surrounding streets.
There was the little matter of 15 rapid deployment police vehicles with full riot shields carrying about 10 fully protected policemen surrounding my site.
Speaking to a local he explained that “they would never harm something intended for their children !!”
It could have been a right proper panic as we say!

The Project
The hardest part of the project was to figure out how to pick up and place these huge poles.
We had to keep the tops level. A bobcat with a then newly added 4 in 1 bucket worked out just fine.
Mind you, tracking over the soft ground in wet conditions makes a terrible mess.
Destroys the soil structure, slows the progress down and makes a site look pretty dirty – best to try and avoid if possible.

A project requiring some real ingenuity.
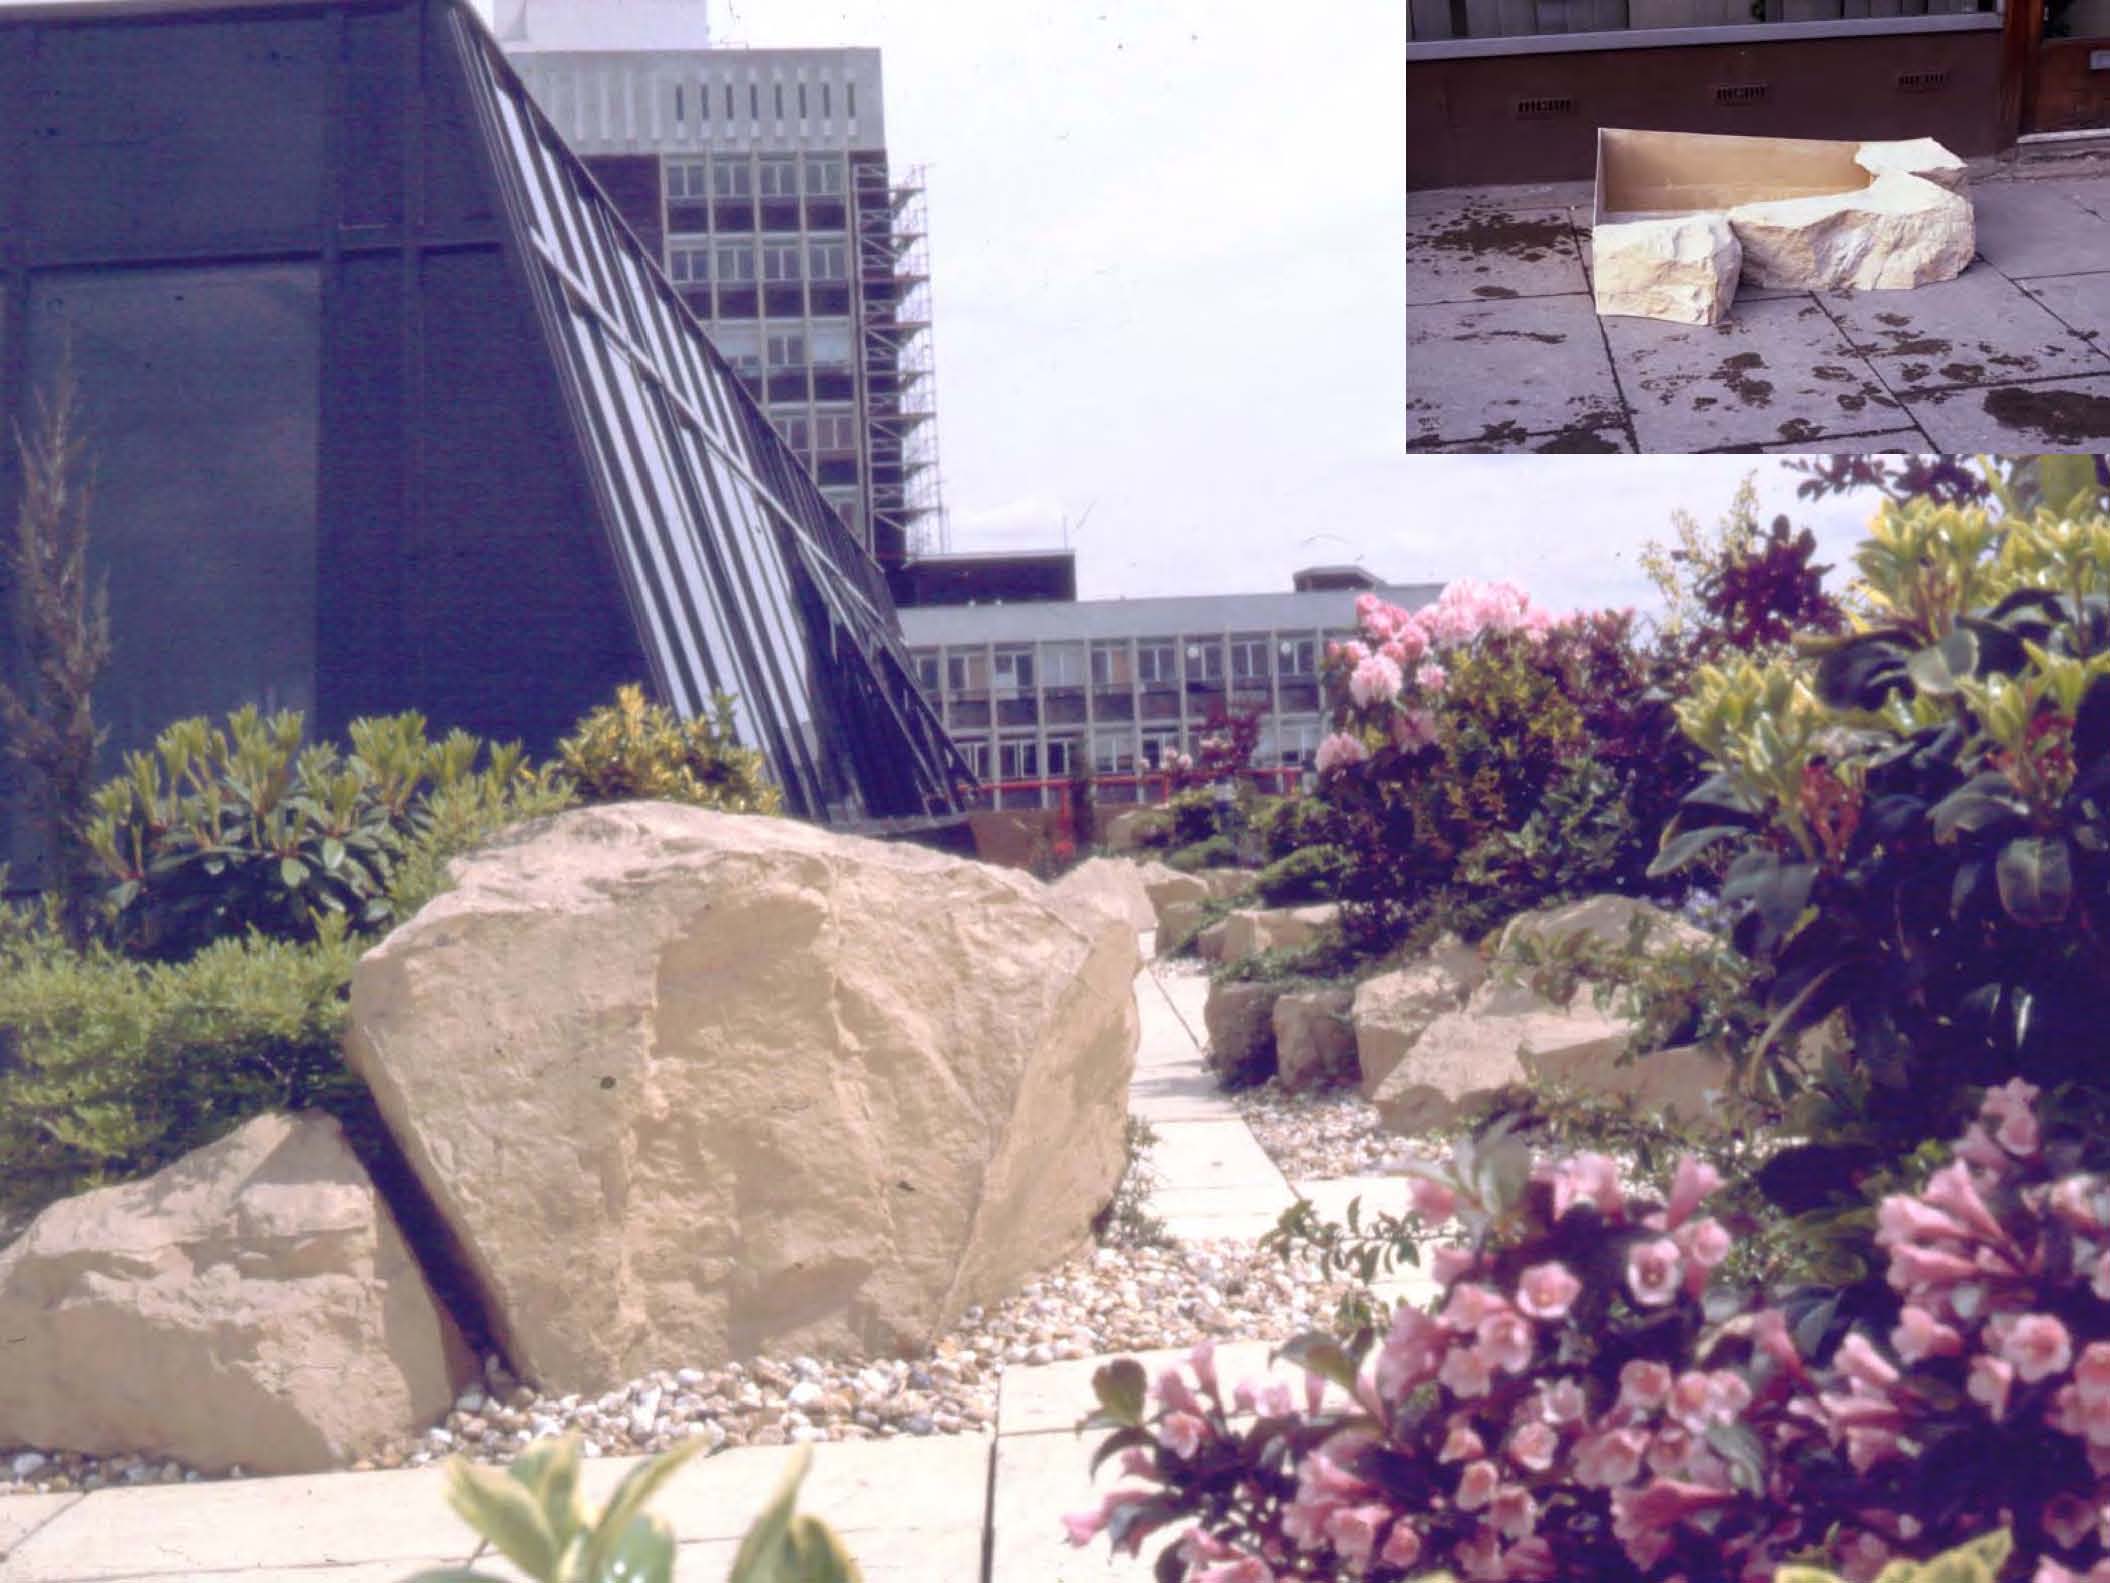
Another prestigious project – A large roof garden on top of the Museum of London.
It was tracing the history of London’s plants and gardens from the middle ages to the present day.
As is always the case working in odd places there are a few obstacles to overcome.
Restricted access
In this instance it was access… the access was a smoke vent set halfway up a wall in an underground car park.
The tunnel extended some 27ft, before the main vent went to the garden area.
Our challenge to move over 400 tons of materials through and up to the roof without damaging all the cars around.

Here’s a picture of the roof before… over the years it had become overgrown and very untidy.
We have cleared all the old planting, set out the new layout.
Then we laid the paving, lined the planting beds with a hardwood framing.
In this picture, the soil ameliorate is being added to the flower beds.
Our access is from the scaffold bridge we built from the basement fire access.

I’m the guy with the bald head in the suit in the middle of the folks on the left.
Yup had to wear a suit in the City of London. I drew the line at bowler hats!
The Completed London’s Pride Exhibition
Below is the finished result.
Which was open to the public for 6 months. My company supplying the staff that took folks around the exhibit.
This project covered close to 27,000 sq ft.
( well ok the ladders were removed and the gate swung back into place..)

It was projects like these that honed our problem-solving skills.
Do drop us a line if you would like to ask a question or have a request.. or take a more in depth look at my adventures in landscaping over the years
Views: 457
-
Dri-lay Drives
Dry – Lay Drives
We developed ‘Designer Drives’ almost 30 years ago..
How it all started..
My partners and I had worked for a London Parks Department. On some of the projects we were working on, we needed to use a strong paving material. At the time Marshalls( one of our suppliers) were testing a product called ‘Monolok’. It had been developed in Europe for use at bus stops. To prevent the heavy buses sinking into the tarmac, on hot days. These ‘monolok’ blocks were of differing sizes and worse ‘z’ shaped. This made them a nightmare to design with.
They were though, a really clever idea. They interlocked together, without using mortar, this effectively meant they stayed in position, didn’t crack or sink, but could be ‘unzipped’ and then relayed – if say a pipe needed working on below.
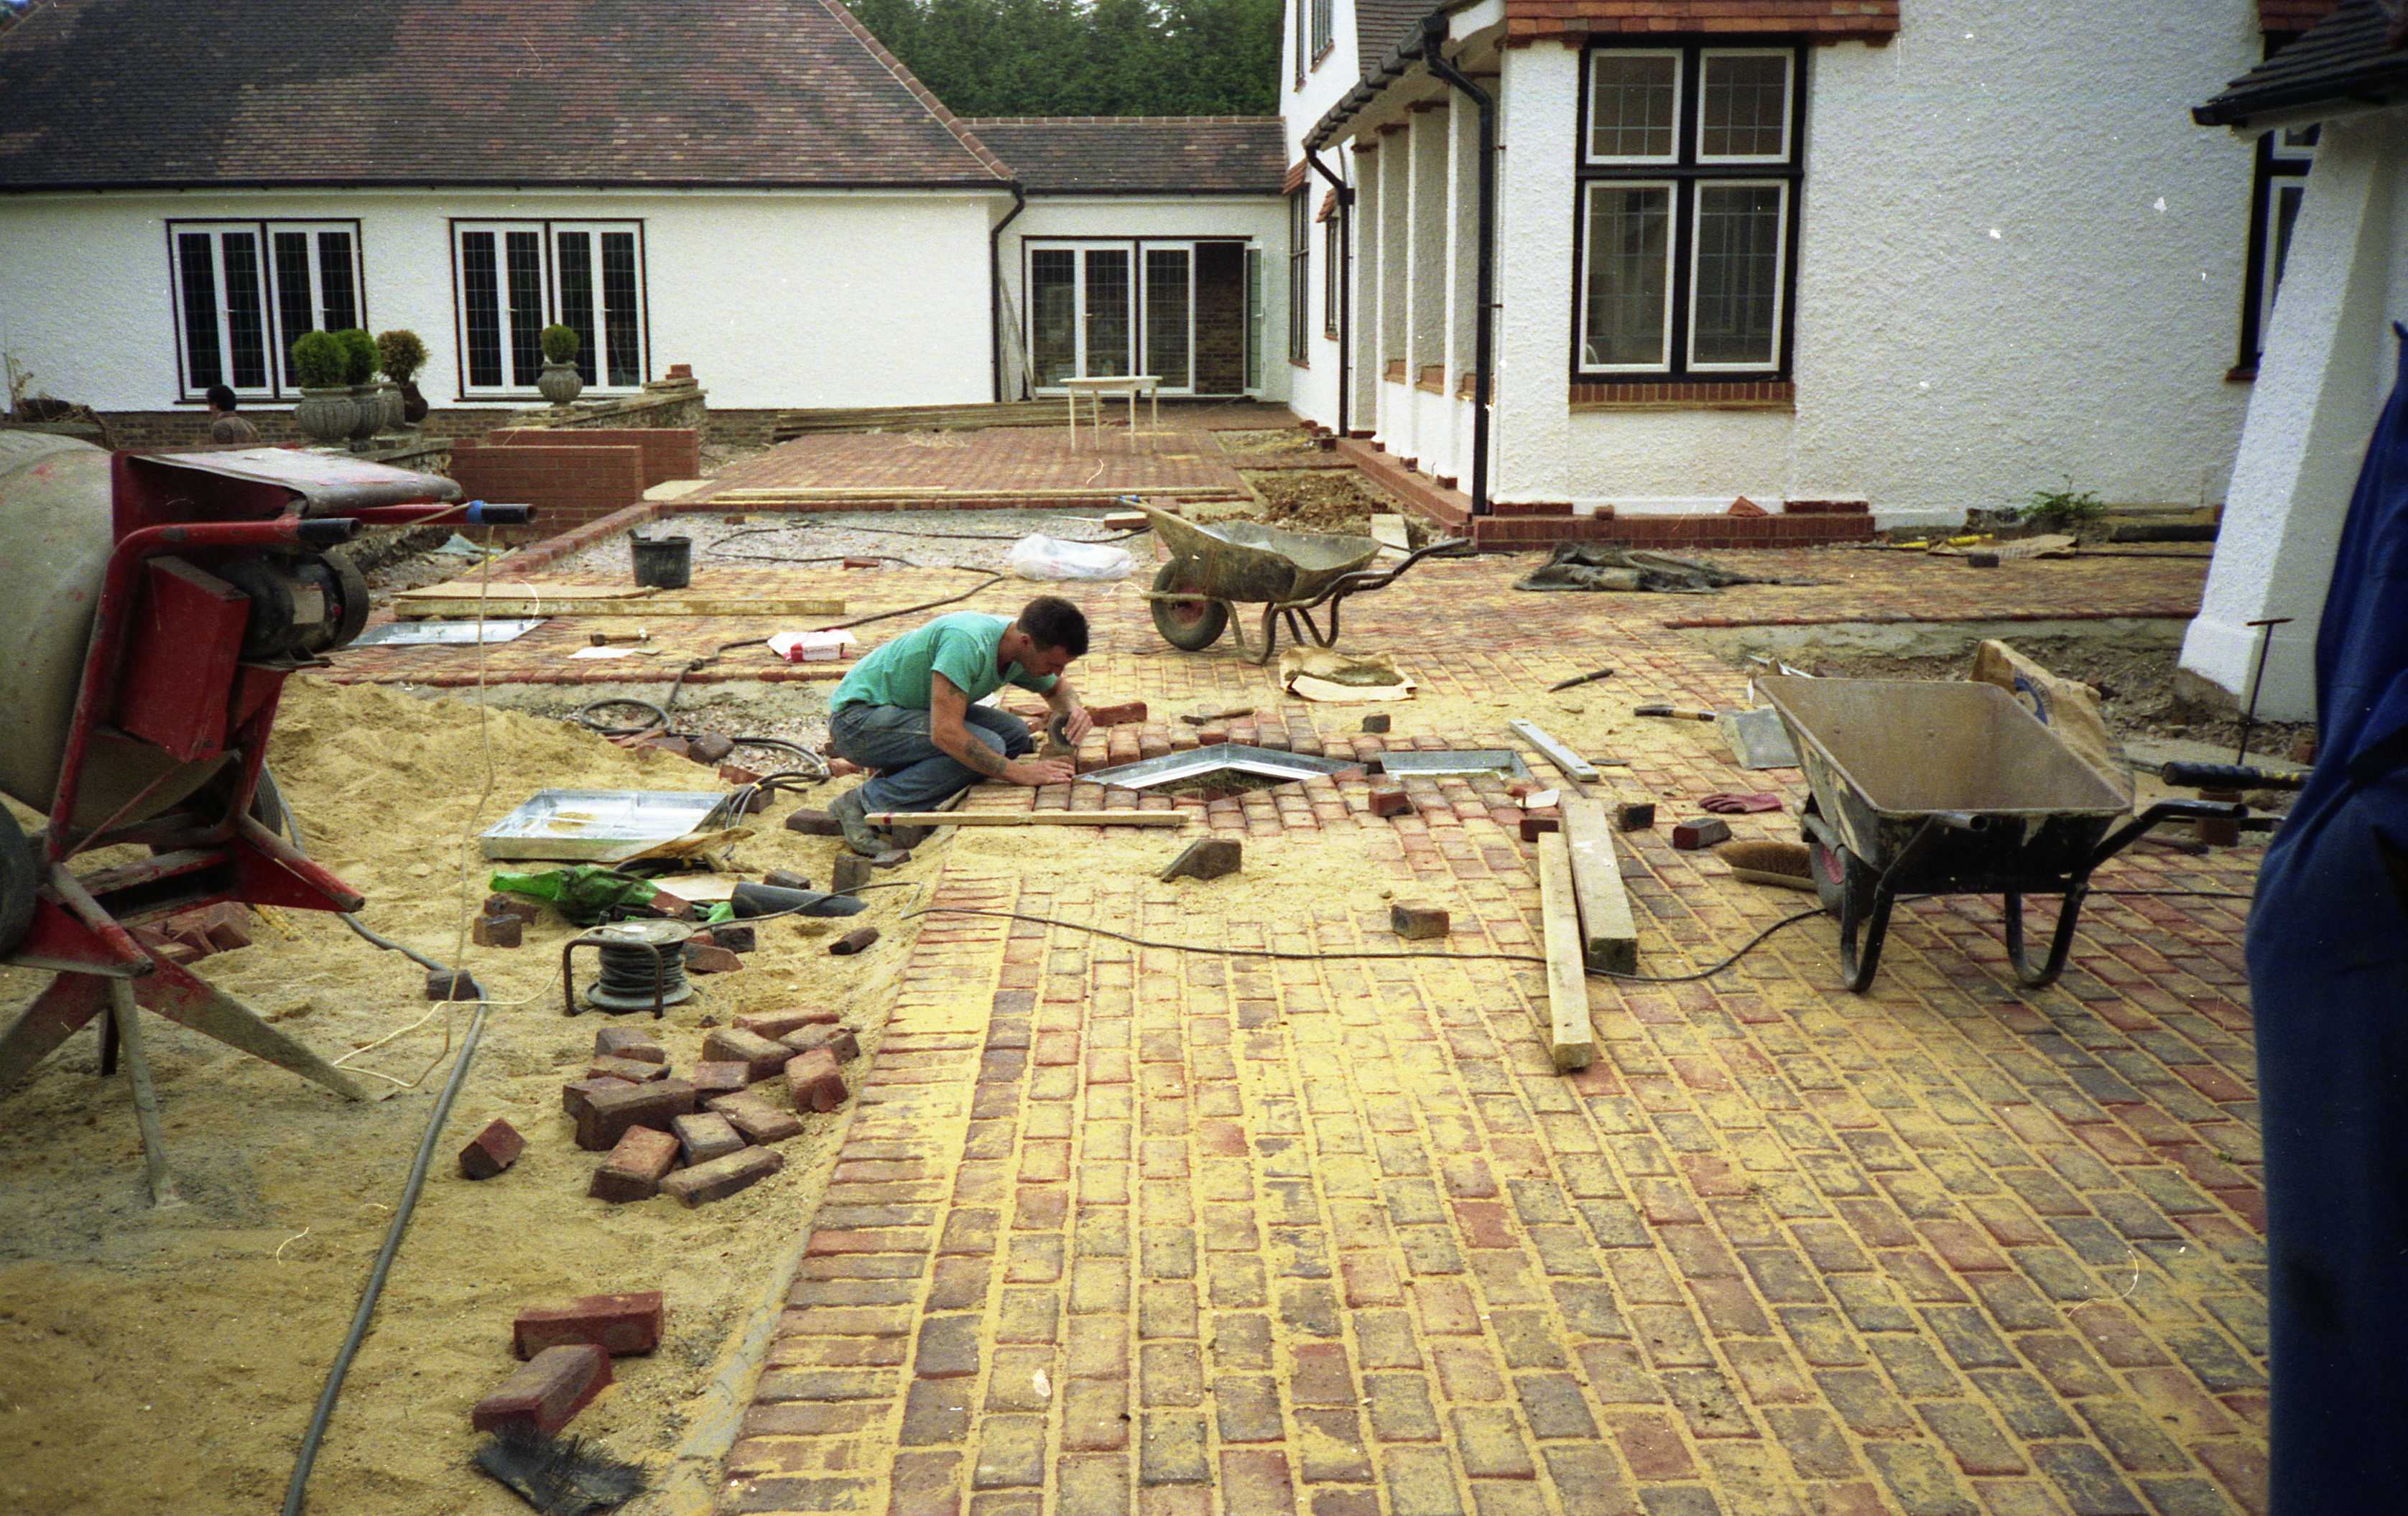
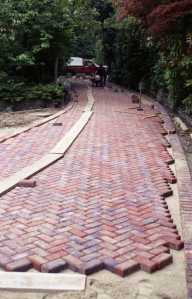
One day our sales contact rushed in with some new ‘brick-shaped’ grey blocks. He told us red would also be available soon. Did we want to try them? We immediately saw an opportunity. Using traditional bricks with a mortar bed required a heavy-duty brick version, worse it took days to point … see below.

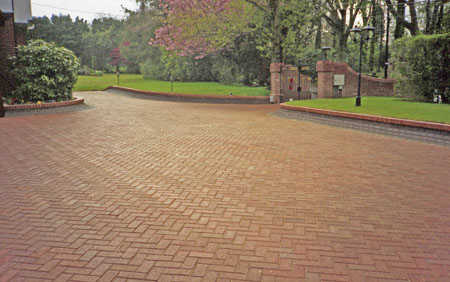
This particular in and out brick driveway took 10 man-days just to point the bricks. Whereas the drive below took 4 hours to ‘sand in’ with kiln-dried silica sand.

Saving so much time, significantly increasing our profits on each project. We were soon demanding new, more interesting colours.. here’s one using a brindle colour mix..
New methods.

It didn’t take us long to refine our own techniques. Adding our own recessed manhole covers. Canting the edges so homeowners knew where they were as they drove around their driveway. – The slightly raised edge looked great visually as well. Setting us apart from our competition.

Here a well constructed and cut in recessed cover… this time using a softer stock brick.

When well done it’s very hard to see the recessed cover, as in this picture.. there are two in the lower picture!

New layout pattern
We soon added a ‘fish- scale’ pattern using granite setts. Then a phorphery sett to our ‘Designer’ collection..
Here’s some granite…much more expensive but they look superb !

When using ‘natural’ products. Such as the granite and real bricks it is important to remember that they are often differing sizes. This means that it is very easy to lose the design module. If you have too big an area its important to have adequate changes in direction.
The stock bricks below work for about a length of 1.8m ( 6ft). Then you need to add a break line or the pattern will start to wander off.

Below is a combination of natural granite setts and softer stock bricks – my favorite by far!

Would you like to read more Landscape projects ? – More Award winning projects
We would love to hear your thoughts and comments
Views: 854
-
Green Roof
Green Roofs

We soon discovered that the modular layout of the green walls worked superbly for Green roofs.
So in 1994 we designed and built this award winning Green Roof in central London.

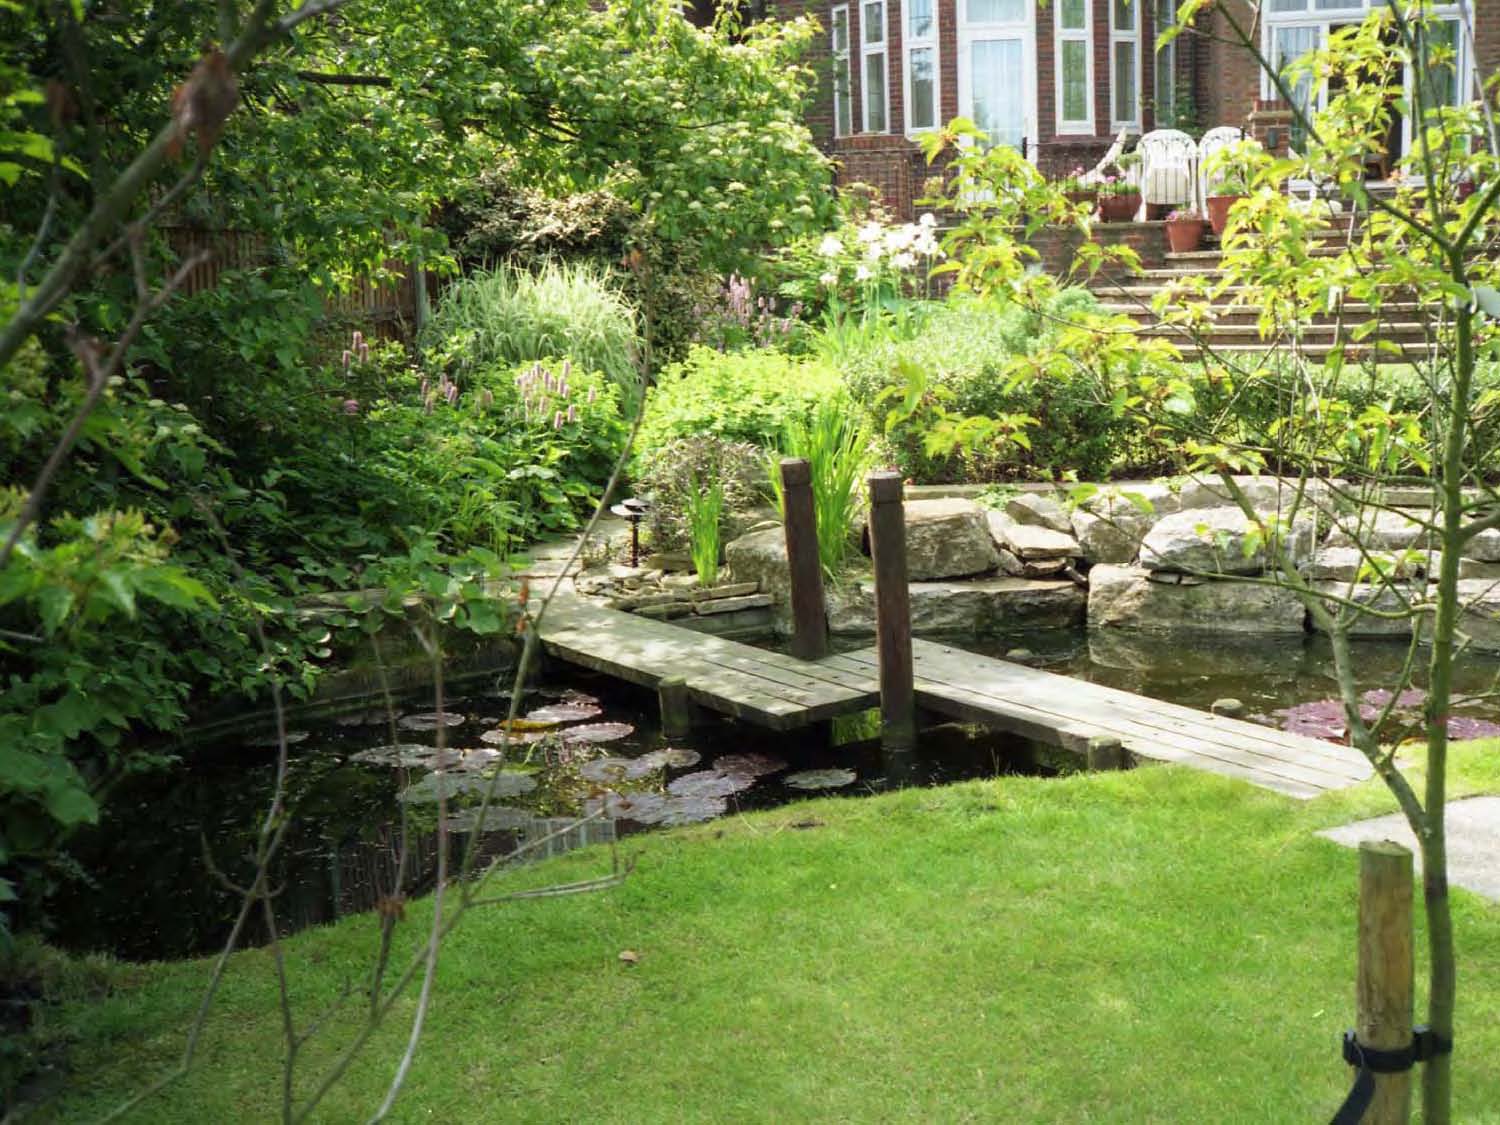
Wooden pathway on Roof Garden Views: 337
You May Also Like
Some unusual moments – while designing & constructing landscape projects
-
Privacy Planting a Garden Hedge
Garden Hedges,
Hedges are often used to create a boundary between sections of gardens. They can help lead you around a garden. Although often their primary role is to act as a privacy barrier. A hedge can be a very useful garden tool.
Personally, we’ve even used ones for security. BY choosing a suitably thorny subject, it can make it impossible for someone or something to get through the branches.
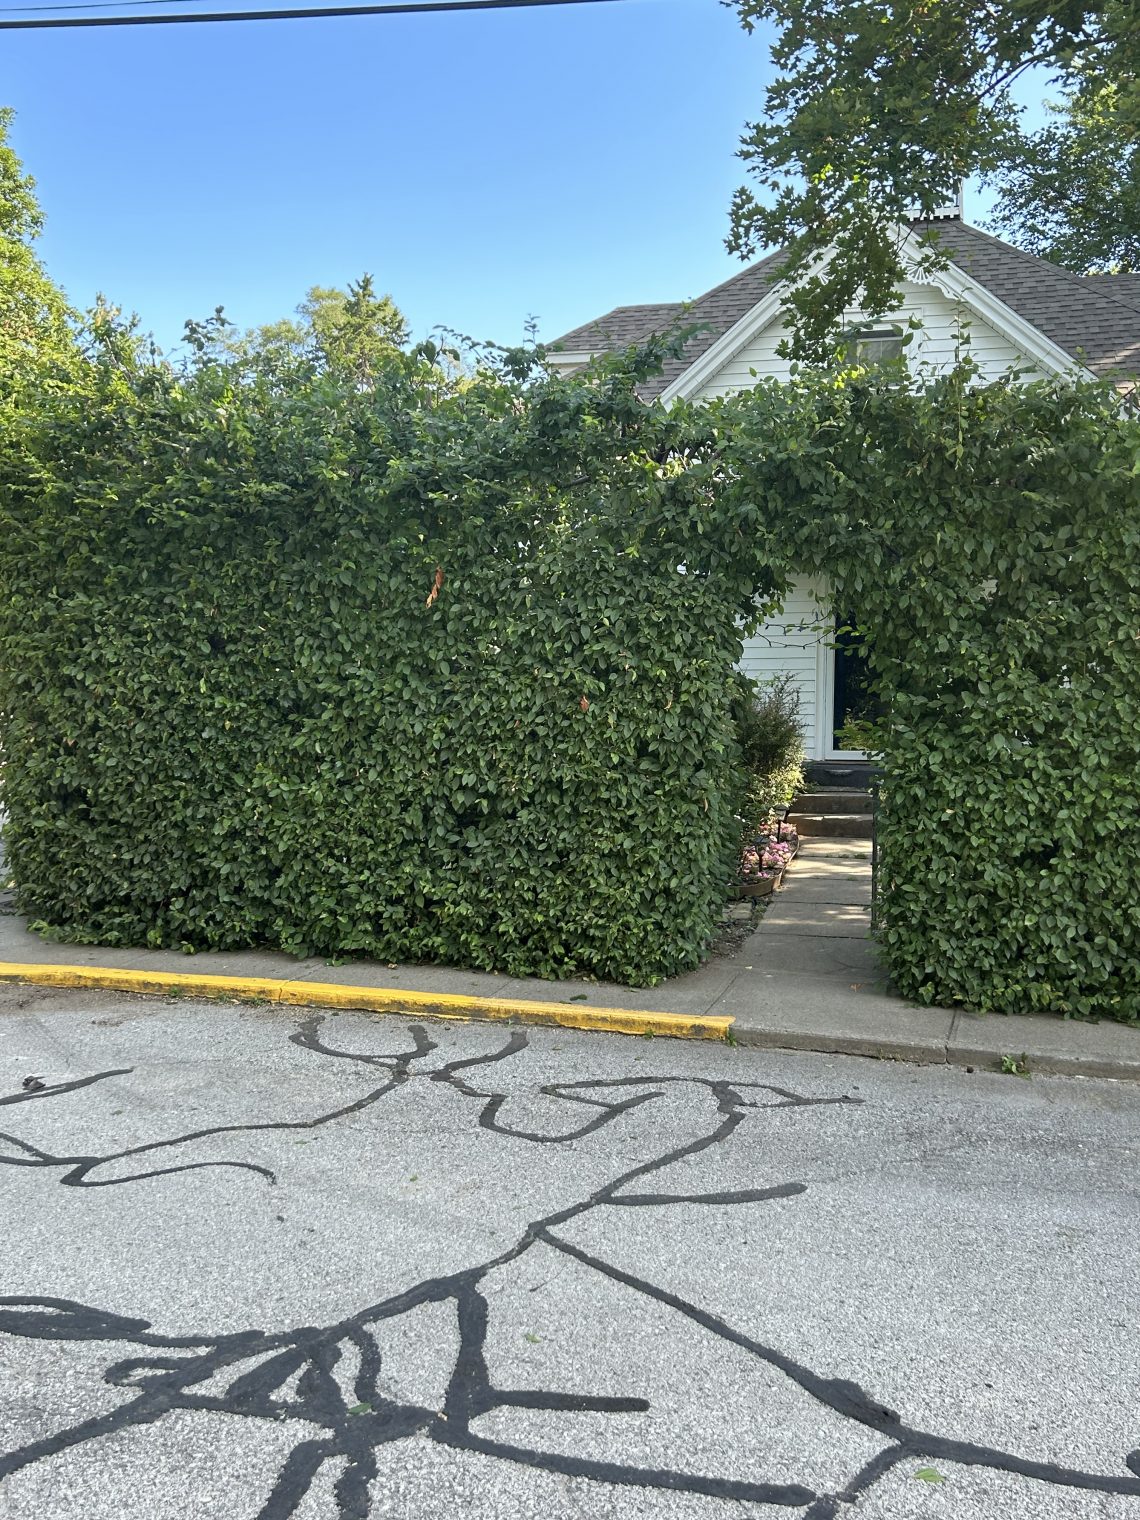
The picture below, shows a hedge being used as an entrance into a garden, creating some privacy and yet leading the eye to the main terrace doors.

A hedge can be grown using almost any plant material that will withstand constant clipping. The list of suitable plants is quite large. At the smaller end you have the traditional box hedging often used in kitchen gardens, or to surround ornamental flower beds, as seen below.

Types of Plants to use.
To create a less formal barrier, you could use forsythia – but remember that forsythia flowers on last year’s wood. So pruning and shaping should be restricted to just after flowering if possible. Hornbeam, Beech, Rose, Escallonia, Cotoneaster, Laurel, Yew, Leylandii, Thuja all make a nice hedge.

Of course the height you desire the hedge, makes a difference in choice of plants to use as well.

Heights of hedges.
The height is also dictated by how often and by what method is used to keep the hedge clipped. As can be seen below, this hedge would take many hours of work to keep it in this condition.

Trimming a hedge can be a simple job, with a handheld trimmer or a more serious project with lots big of equipment.


Clearing away the cuttings Views: 298
-
Outside Home Check List
Outside Home Check List
After starting my Real Estate career in England in 1971.
I left for 25 years to development a multi award winning External Works Design & Build Company in London.
Residential Properties
Part of this was spent designing & building high end landscapes on residential properties in Southern England.
We developed an initial review list of what to look for when considering the potential for properties, along with expected on going aftercare.
Our construction teams focused on detailed hard & soft landscaping.
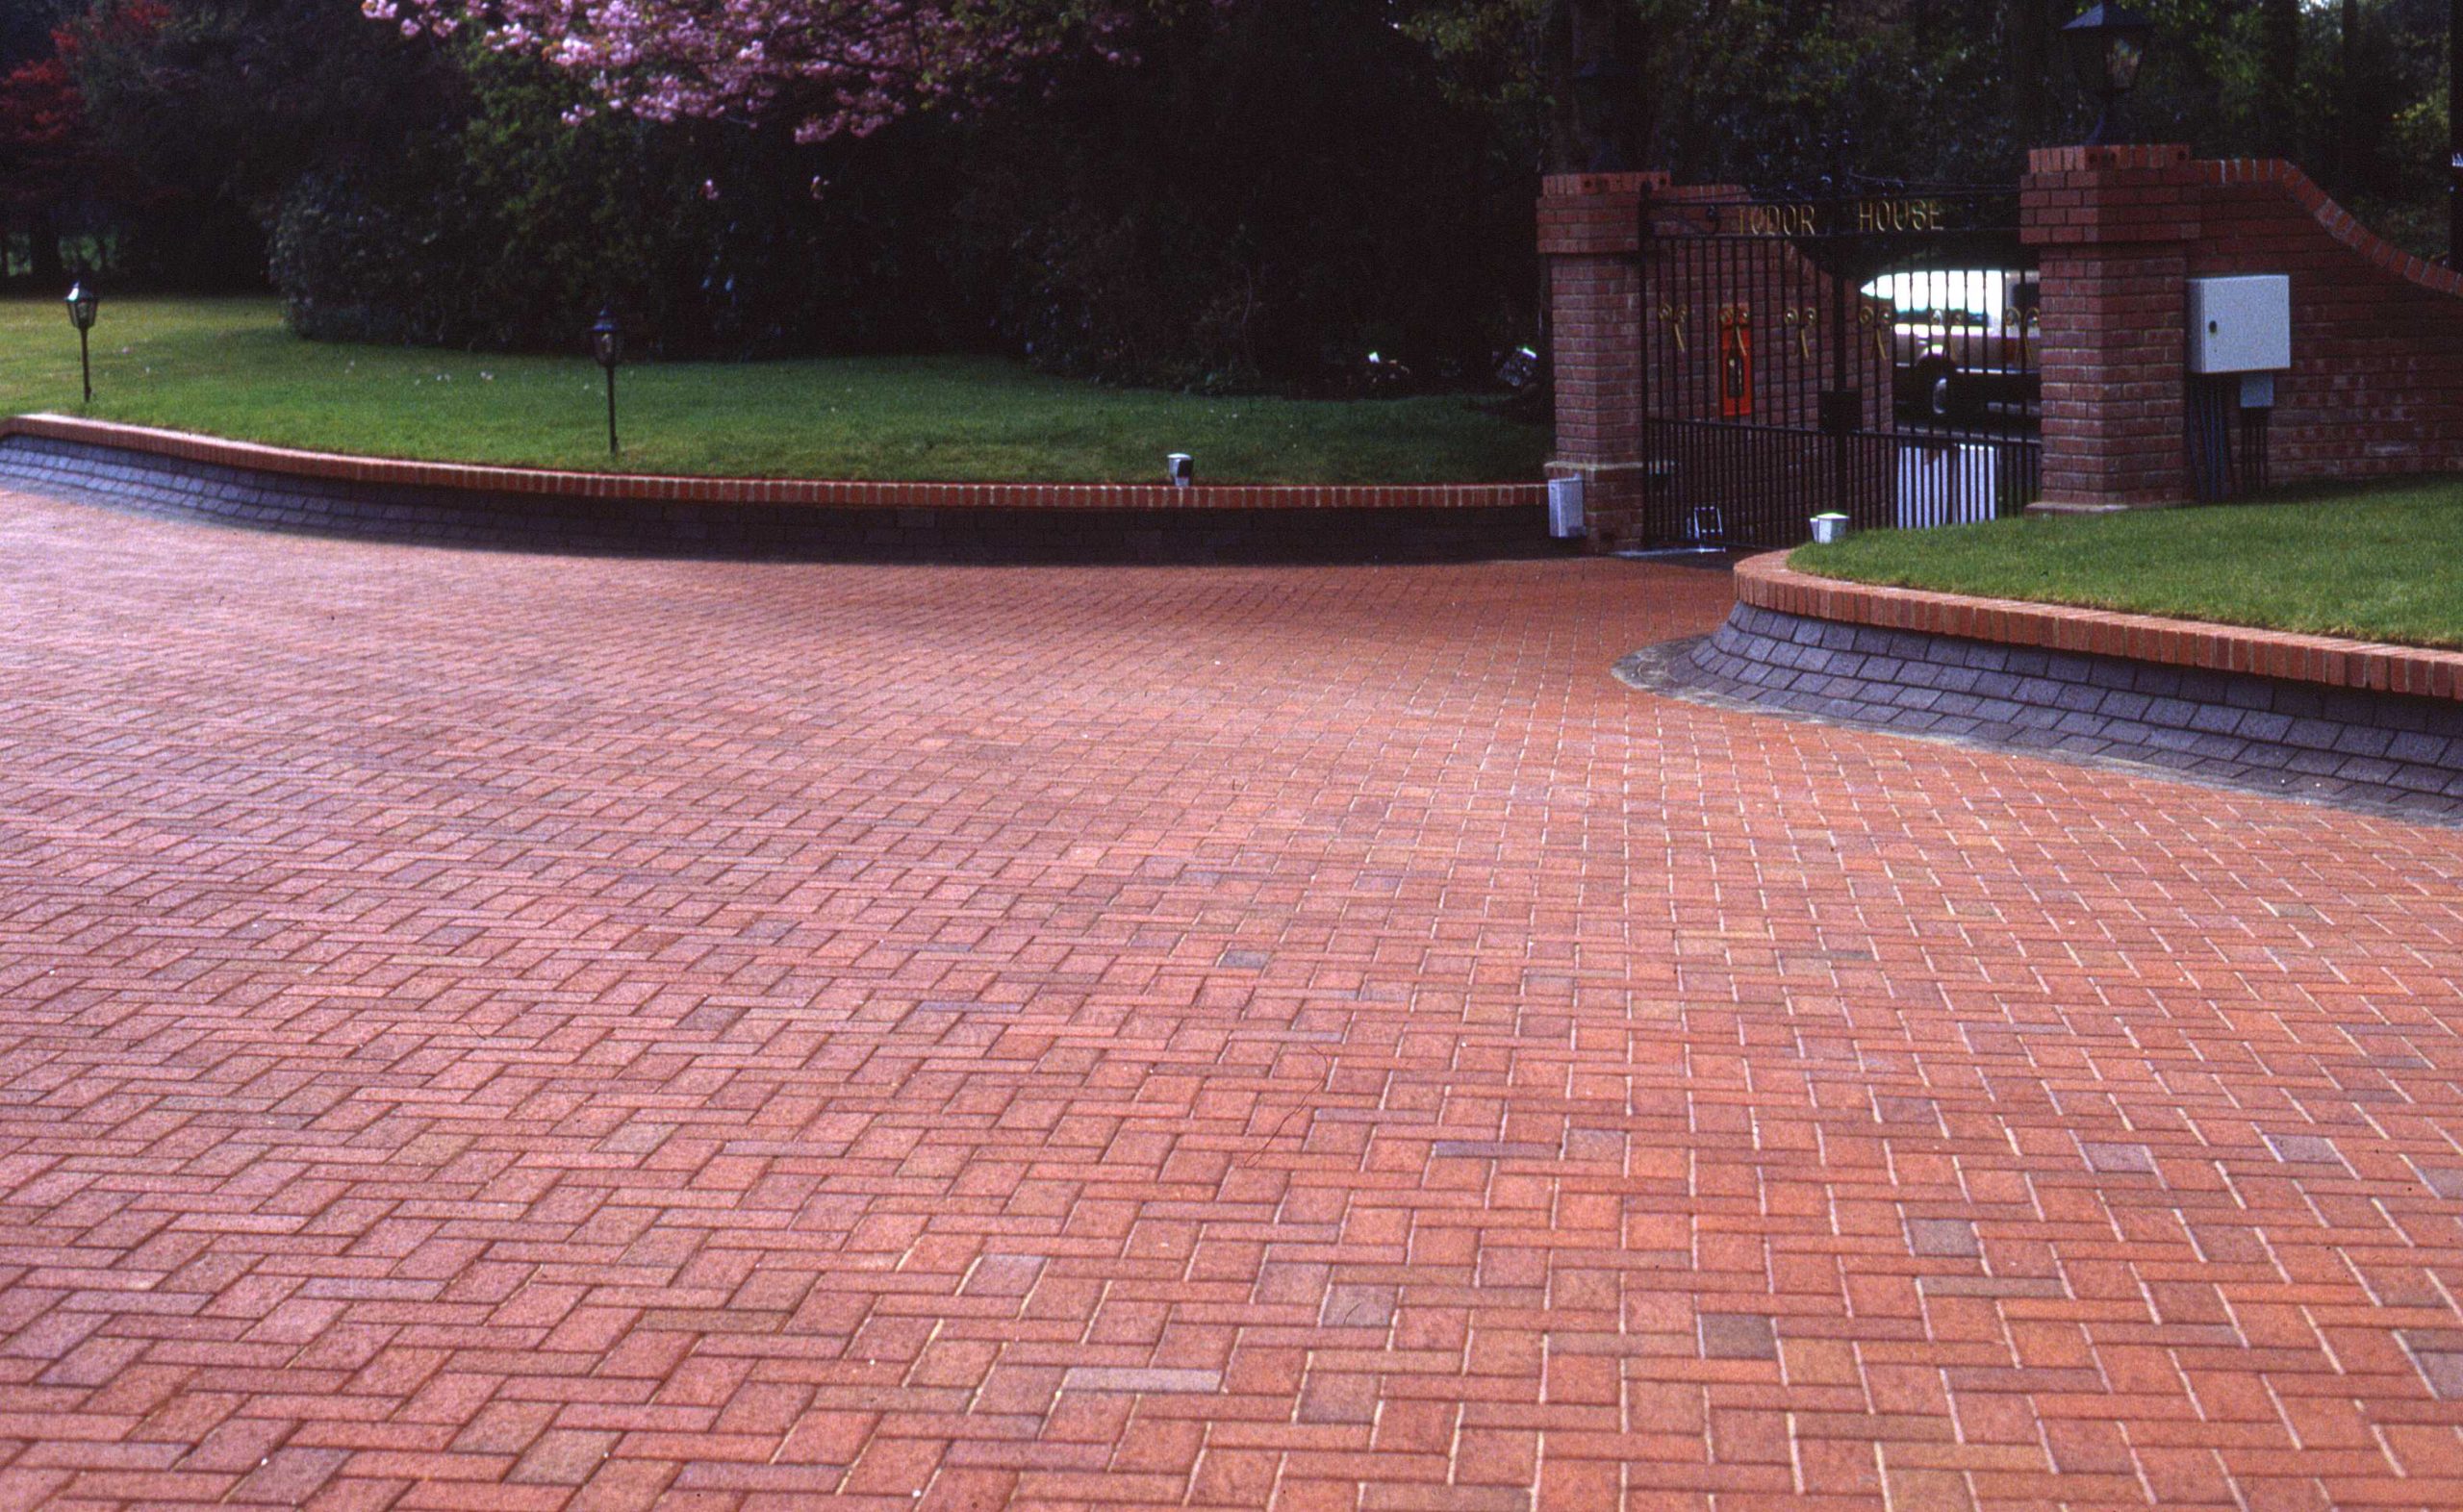
Developing new ‘Designer Drives’ using a ‘drylay’ system with block, brick and granite materials as early as 1982.
Natural brick & granite 
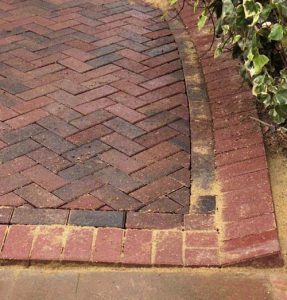
Natural Engineering Brick Dive, in herring bone pattern 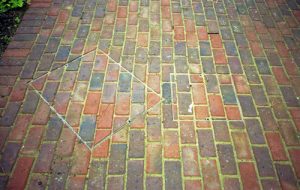
Recessed manhole access covers cut into drylay brick paving Can you see the second manhole cover ?
Canted block edge that leads the eye around the design.
Practically to let a driver know they were nearly off the driveway.Some larger homes benefitted from a less expensive softer appearance as below when we used a bonded ( with fibreglass resin) gravel drive with brick gulley detail.
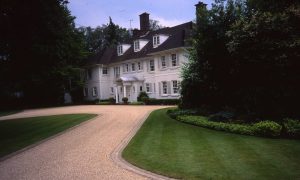
Triple brick drainage channel set around a bonded gravel drive 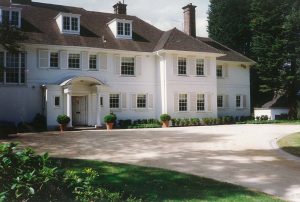
Bonded gravel with brick gulley edge 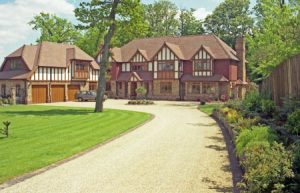
Bonded gravel with brick edge Whilst the list is by no means complete, I am planning on creating a section within this website to show the various techniques and ideas for homeowners.
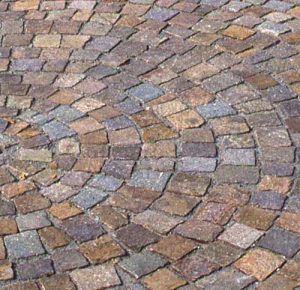
Porphery setts laid in a radius 
Granite paving to create a Mediterranean Style dry landscape I haven’t made any suggestion as to cost simply because each site is different.
There are many factors impacting costs, not least access, planning and zoning, time of year, scope of works, current material & labor costs.
I do hope though that this provides help in your overall assessment of the property you are reviewing.
I will add sections each week with picture examples.
Just send me an email or complete the form below with the Subject : “ Outside Forms” adding what you are thinking about doing, I will be happy to make suggestions.
Views: 295
You May Also Like

Forms for the buying process
-
A natural stone patio and entertaining area
Patios & Terraces

A Brick and Stone Terrace
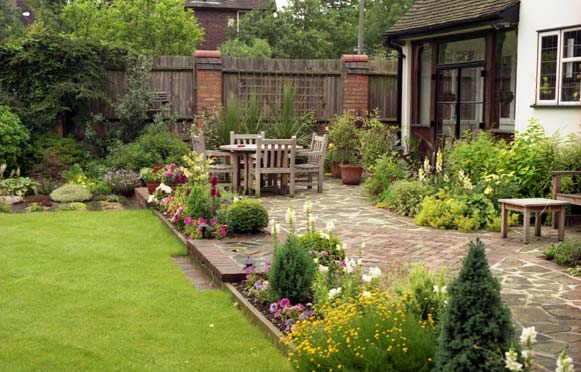
A lovely natural stone and brick patio, surrounding a conservatory.
Today, I thought it would be fun to show you a series of before, during and after pictures of a patio/terrace construction.
Mick and Steve who constructed this lovely terrace. Are extremely skilled craftsmen.
If you look carefully at the stone cutting you will see how ‘evenly spaced’ all the joints are .
Base Foundation.
It all starts with good preparation on a stable foundation. In this case around 100mm ( 4 inch) of graded limestone base well consolidated.
If the ground is moist or subject to shrinkage it’s a good idea to add a geo – fabric beneath the limestone.
Surface.
You should make sure the finished height of the paving, is at least 150mm ( 6 inches) below the damp proof course set in the house brick walls.
It is also a very good idea to create a fall away from the house to your drains, ( at least a 1 in 80 fall is required).
Also, consider the need for allowing moisture around the house.
If you are on heavy clay, it is a good practice to allow the clay sub surface to remain a little damp during the summer to prevent the ground ‘heaving’.

First the walls and steps are constructed. 
Note how clean the working area is. 
Here Mick is carefully, pointing the natural stone, using a semi dry mixture of soft sand/sharp sand/ cement. Make sure the conditions are dry. Then firmly point between the paving joints. 
Raised brick seating area 
The completed terrace, with low walls to enable larger groupings , for entertaining. The gently curved wall naturally leads the eye around the establishing garden Views: 155
You May Also Like
Creating mystery & intrigue with Timber Walls, Fences & Trelliage
-
How it all began……..

Beautiful landscapes take time, professionalism & commitment, from the owner, the designer, the builder and the maintainer.
Unlike almost any other purchase a homeowner can make, an external project involves nature, nature has a habit of seeking attention often !
So let’s take a moment to walk into my life as they say.
There is a well known expression ” The customer is always right” – this is very true. It is essential to build the customers trust, and not lose it, for once gone events have a habit of sending everything as we say ‘Pear shaped’ …. today, let’s stay positive and explore some experiences….
I only know ‘My’ experience, which to be fair has been fairly extensive, as well as fun, over all very enjoyable, with the odd heart stopping moment, which we will discuss later.
My school days, yes ,I was privileged, were at Bearwood College, it’s a school in a beautifully laid out estate. Designed by The Rev Gilpin back in the early 1800’s for John Walters the founder of ‘The Times’, – some 500 acres, at school we were expected to do Estate work on the huge grounds once a week to help maintain the appearance of the school around the mansion house.
So as a youngster for 2 hours every week we played at aftercare of a huge Estate – I’ve just interviewed a colleague who did this for real as a Head Gardener of a 12000 acre estate, with among other things a 44 acre formal garden, this after years of designing spectacular award winning gardens, it’s a fascinating interview, as the estate is probably the busiest in the world with many events attracting over 100,000 visitors at a time, there is a motor racing and horse racing circuit within the grounds ! – you can hear Alan shortly on Growing Trends Podcast

During my vacations to earn additional pocket money for school – the Tuck Shop was stocked with all things fattening, that us kiddies always preferred to real food ! No just kidding.
I worked with a friend in his dad’s business of Forestry – we planted new woodlands in the winter break, did more planting in the spring break, then weeded the newly planted woodlands with a long handled hook in the summer break – it was heavy work but very rewarding, the ploughman’s lunch with a pint of shandy at lunchtime sitting out in a pub garden in the summer was glorious, however toasting your homemade sandwiches over a small twig fire in the depths of winter, cold, soaking wet, drinking peppered hot bovril wasn’t quite the same, especially as your toes were on the verge of frostbite !
Even the summer days had their own special moments…
“That is until you came across a wasp’s nest buried in the ground in your row as you cut down the foxgloves, brambles, and other assorted weeds a swarm of angry wasp’s chased you along your row, which I might add was almost always a vertical hillside ! The really scary one was, when a pheasant launched itself at you as you almost chopped its head off ! It used to take me a few minutes to calm down from that – you never ever hit the bird, or really saw it, but you sure heard it, and it was a huge blur as it flew past you.!”
After leaving school, working for a year at an Estate Agent’s introducing clients to property investments, helping sell houses and commercial properties all around the Thames valley.
I heard about a new landscape course at Merrist Wood College, was accepted, and spent three years really enjoying myself earning a College Degree in the process !

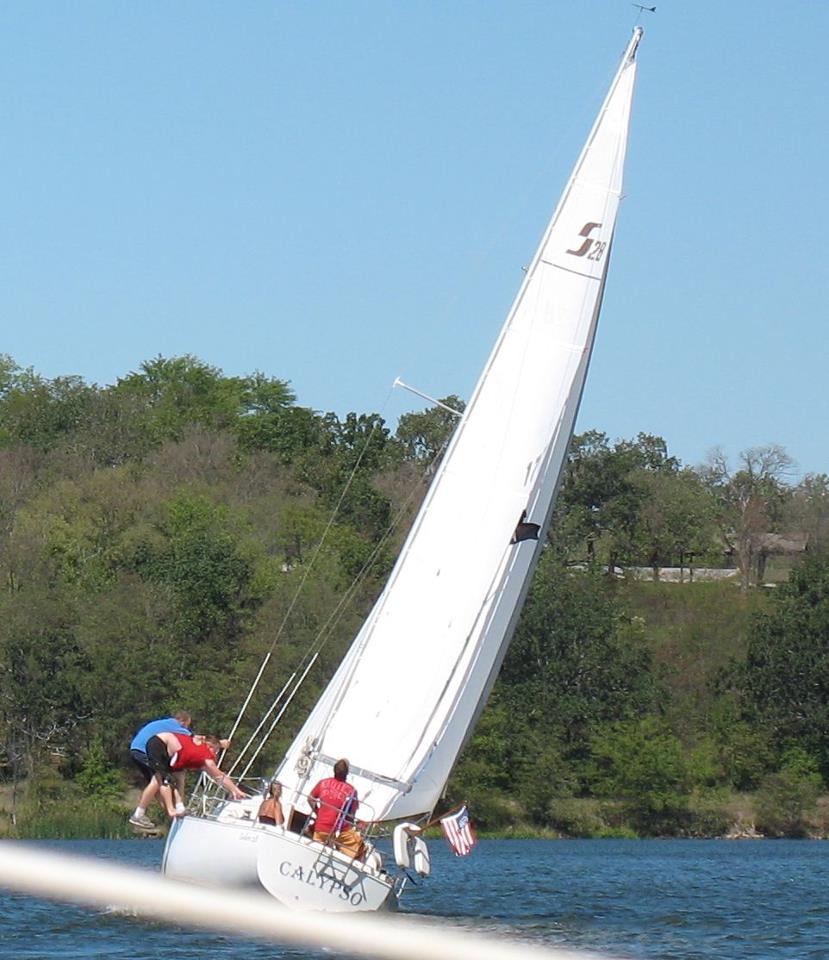
The course was so good, everyone of us was head hunted way before the course finished, well, now that I come to remember Bill, he had the new MGB sportscar, decided to buy a yacht and sailed off into the yonder, never to be heard of again !
Subsequently I discovered how much fun it is to have a yacht and go sailing !
I spend a further three or four years in a London Borough’s parks department learning some serious construction techniques – they called us Landscape technicians. There were six of us, in the group, when four of us left and the fifth joined the ranks of the clergy, one of the original six is still there so Ian must have 43 years of service ! It took almost 12 full time jobs to replace us !
We learned a huge amount, it was a great place to learn, with lots of variety, seriously engineered construction techniques, a dedicated to us work study team, so we knew how long items took to build.

Overall though it lacked the ability to really expand ones horizons, beyond parks, open spaces & schools, so after three years it was time to move on.

Private practice was a completely different place, armed with the knowledge of how to build to an exacting commercial standard – something that held us in very good stead as we built our company, we did something probably unique at that time, we deliberately concentrated on Design and Build we won one award after another, ( currently 17).
We achieved this mainly because we created a standard working method, for our staff, we used standard details that we documented,. Most importantly we loved to experiment with new ideas.

No we didn’t do this ! This is a planning ‘item’ in Oxford, but I bet you took a couple of looks at it !
One of the first A-ha !!! moments was Dri-lay drives, it happened because a client asked for a brick drive with a dark mortar joint.
We duly designed and installed the drive – which took two men 10 days just to point by hand !. This seemed a waste of potential profit , so recalling our local authority days the next one we tried was with the dri-lay method we had used in parks, the very first project saved us over 50% of the normal time to complete !

One of the design features we added, was a ‘canted’ brick edge, when ever possible this served two purposes, it was visually very attractive, catching the eye, creating a visual movement.
More importantly for the housewife, it was a superb aide memoir when driving onto as if you got too close to the edge the powered steering ‘tweaked’ enough to prevent you from driving into the landscape – this produced lots of customers from recommendations..
Below you see the first ‘dri-lay’ natural brick drive, we used a harder brick at first as the clay bricks tended to snap if you applied too heavy a vibration – after a while we figured using a rubberised mat would alleviate this issue.
The bonus to us, the first drive took 2 weeks to complete, this one was finished inside 4 days !

I well remember driving to a large concrete manufacturer of paving and blocks in 1984 and asking for help with our advertising budget – in those days the firms would pay a percentage of your advertising if you mentioned them. Anyway we went up to Derby from London ! gave a presentation on ‘Designer Drives” , it blew them away and we were politely told that the market didn’t exist. – a year later we had 5 crews constantly working building Dry lay drives, so many firms were starting to see the market potential. that we moved up to bricks.

By then we offered Block Drives, Brick Drives and for the really discerning Granite Sett drives – I have to say a granite sett drive looks quite exceptional
We also learned a valuable lesson, as we didn’t want to just build drives, we broadened what we offered clients, adding canted brick edges, specially designed recessed manhole covers, multi coloured drives- which then became ‘brindled.’ As the manufacturers caught on.
Pictures of our drives appeared on advertising brochures from those very companies.
Our next Aha !!! moment was the recessed manhole cover, which we made ourselves at first..
See if you can see the second one in this picture above! This project was one of the first where we used a specially made stock brick the yellow is the kiln dried sand we used to brush between the interstices.

and the final result ..

We designed & built lots and lots of drives…100’s of 1000’s of square meters in area.
We learned some valuable time saving lessons, the best looking was always bricks laid 45 degrees from the road direction, they took longer and required much more cutting, so warranted a slightly higher charge, but they almost always looked better.
Natural bricks are not a standard size, so after about 6 ft (1.8m ) of one direction the joints tend to start running out of line so be careful how you set out. Oddly 45 degree herringbone actually helps to hide this visual effect.

I have to admit that it has, and continues to be, an awful lot of fun and enjoyment, not to mention the satisfaction that comes from achieving a well thought out and attractive scheme, or seeing a client years later saying how much they have enjoyed what was done, how well it has lasted.
A case of “Quality is remembered long after the price has been paid.”

I’ve always adopted a slightly different approach with private clients as I felt that most were not highly conversant with contractual law, or quantity surveying, always striving to give sound , honest advice, and maintain a high quality finish no matter what….

How is it that some projects just look wonderful and others just ok ?
The answer is in the detail and the finish.

There is also no doubt in my mind that, the more experience one has, the greater the ability to be able to produce , not only an award winning scheme, but also to ensure that the design is both workable and economically viable – of course if money is no object ? – I have personally worked on a few projects where money was not part of the equation, oddly they didn’t work out any better than a well designed and thoughtfully implemented scheme.
Some more A-ha !!! moments later , especially as we have grown longer in the tooth, we become smarter and now obtain patents for our “A-ha !! ” moments.
In the meantime do listen to our interviews at Growing Trends
Drop me a line if you have a question or request.
Chris
Views: 139
-
HortCuisine
-
Hello world!
How it all started, my first job.
It’s been very many moons since starting out early one morning to work ‘in the woods’ near
my home in Caversham, Reading.
Leaving the house at 6.30am, with a hoar frost on the ground, piling into the back an Austin van, joining three others who were much more able than 14 year old me.

My mum would pack a lunch for me and added a thermos flask of hot soup.
Matt, the foreman greeted me, introducing the rest of the crew, Wilf an older gentleman
with a very gruff appearance, Aleric a much younger, very well educated fellow, David, who was my age
and the son of the boss. he was also my friend.
We were only driving about 15 miles to a small village called Checkendon where the boss owned a small woodland – around 20 acres of mixed hardwood planting.
We arrived at the five bar entrance gate, the area looked like an over grown field. Then driving down a small track, that stopped at an old rectangular concrete building with just a door, no windows. Everyone piled out, and headed for the building, inside were a selection of ‘v’ shaped planting spades, a bunch of ranging poles and a large pile of plastic bags with various bare root tree species inside.
The plan this day was to complete a mixed hardwood woodland planting. The planting distances were 5ft row separations with 5 ft planting gaps.
Views: 10
-
Growing Trends is listened to in 48 countries, our new program is all about people like you, from all over the world.
We would like to hear from you with ideas, comments and suggestions for our shows drop us a line at chris@chriscoope.com
We have been making changes to Growing Trends our internet based radio show, which we started back in 2015

Time to Eat – All about growing Herbs & Vegetables
Gardenesque – Everything to do with Gardens & Landscapes
World Wide Wesponsibility – A more serious look at sustainability and how we might all help our planet.
Face Time – Interviews with experts on topics of interest
Book Reviews – Interviews with authors of books relating to the environment, nature and garden landscaping.
Perhaps we could interview you for our Face Time segment? …. just drop us a line and we will contact you.
Views: 178
You May Also Like
A rare moment of peace in the perfect haven of a landscaped garden
-
Are you planning to add to your landscape?
Winter Time
As autumn and winter move in, with leaves changing into many hues of red and gold before falling to the ground.

The weather starts to turn chilly, the growing season is coming to an end or is it?
Some plants will head towards dormancy, others being more frost resistant will provide the last gasps of color, before winter sets in.

For the luckier ones living in warmer climates, not so much changes.

If only we could all enjoy everyday scenes like this ! Climate Change
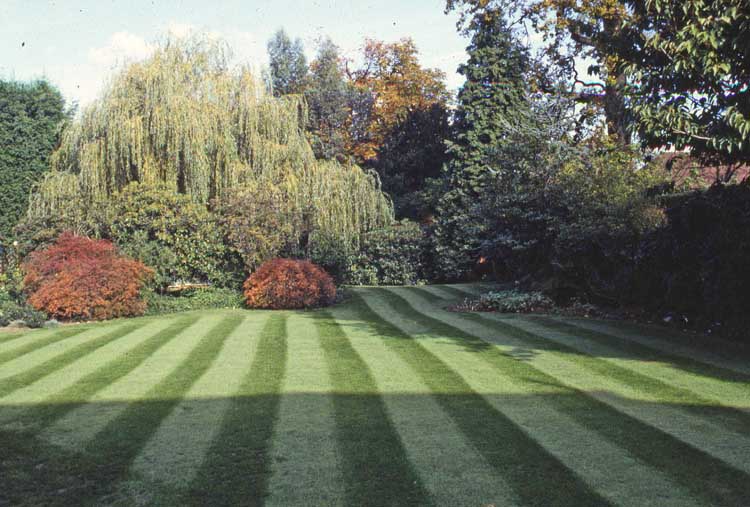
For some others the climate has changed enough to wonder if it’s time to convert the ubiquitous lawns.

Are we going to have to change this view? Maybe into something more akin to a dessert landscape or perhaps a Mediterranean or Xeriscape landscape.

Very low maintenance, Mediterranean style Time to Plan
Now is a great time to start planning any changes as you can follow some simple guidelines.
First establish a budget. Now look at the existing and consider what you might want to change and why.
Write down a wish list of likes and dislikes, add if I could I would do this, etc,.
Design
Now it’s time to decide if you want to do the work your self?
Or find a contractor to start gathering information on materials and costs etc.
Or engage a designer who can work with you to produce a plan and a program?

Each method has it’s pros and cons. Is often decided by available budget or available time to allocate to the project.
My experience has been that most busy people are also quite successful and can therefore afford to engage a designer
They also tend to like to know what they are getting into before they start , so a design works great for them, they also like detail.

Landscape Plan Practical people can often gain most from actually working on the project themselves.
They tend to be natural problem solvers and enjoy the discovery of ‘how to achieve something’
The best advice I learned was to consider what you would like in say 5 years time, as this is often the time when any changes are going to look their best.
It is also a time to consider where you may be in your own life cycle, for example age of children, type of free time available etc.

It’s fun here… There is a “Growing Trend’ towards sustainability.
Growing one’s own food.
Now is a great time to look at all the methods available and how much time should be allocated to such endeavors.

An example from a Chelsea Flower Show exhibit Listen to ideas from experts at Growing Trends
Error: Contact form not found.
Views: 125