Landscape features
-
Creating mystery & intrigue with Timber Walls, Fences & Trelliage
Last time we talked about paths.
Today I thought it might be advantageous to discuss ‘Timber Walls & Fences’.
We will include Trelliage as they all have a role to play.
Helping to create a certain kind of mystery within a garden landscape.
We’ve discussed hedges recently, so you can scroll down to that article if you would like.
These ‘vertical materials’ are acting as a visual or physical barrier between differing areas.
This leads the eye on to a new discovery or perhaps just creating an interesting space.
At some time fairly soon we should add ‘Green Walls’ which are gaining in interest and can look absolutely superb.
I wonder how long it is before we develop these to grow vertical edibles ?
Having designed and built a huge number of gardens over the years. We have gained valuable experience in what works best in a given situation.
Using Timber.
The garden below, was primarily designed to reduce aftercare. Taking care to keep the beautifully rustic boundary fencing, which blends in to both the surroundings and the new work so well.
It was necessary, to repair the odd arris rail, a couple of fence posts and some slats, re-hang the side gate etc. Overall by keeping the original fence the rustic feel was, I think, you will agree maintained.

Low hit and miss side fence with 6ft feather edged boundary fence & framed gate Start with what is already there.
It’s nearly always best to work with what is already there, rather than ripping out everything. My first task is always to look up and see how the tree canopy is. Then beyond the space we are working with.
To see what impact, we may be making without perhaps realizing how a neighbor might view our endeavors.

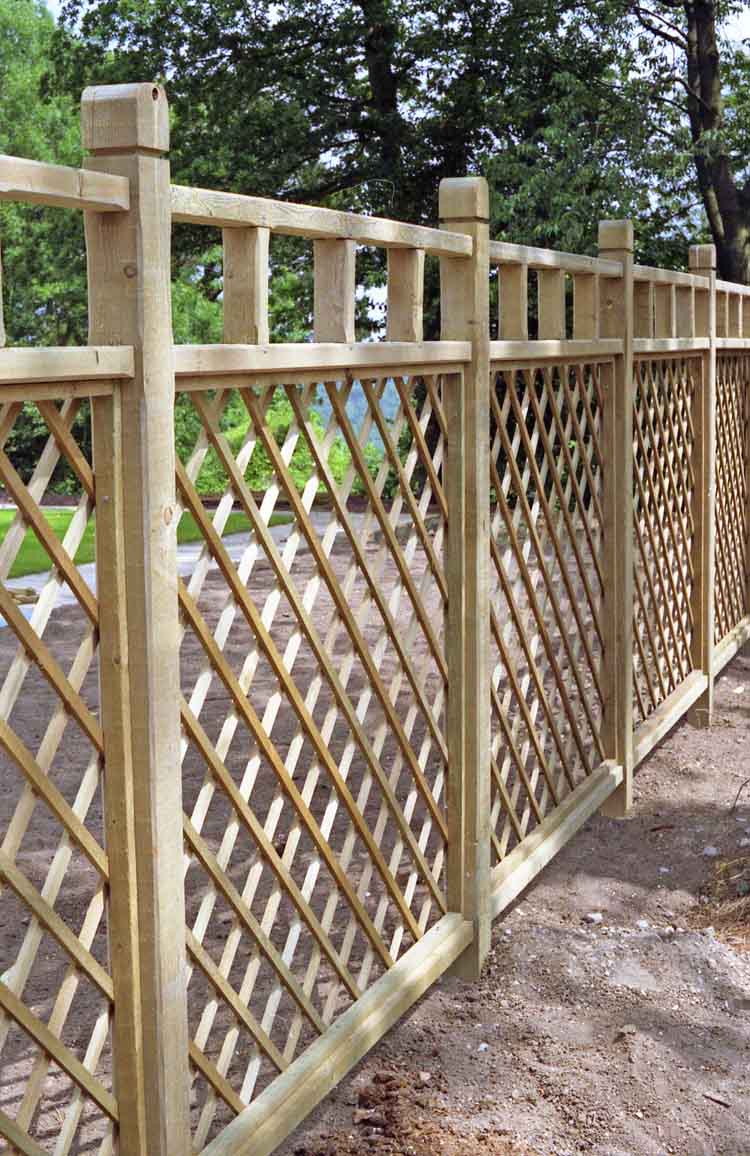
Very low maintenance, Mediterranean style In small gardens complete barriers tend to make the garden smaller. It is best to create more of an illusion of a barrier. This is often best created by using trellis. Here is an example that we stained black.
A word of warning, trying to make a gate from trellis is fraught with problems if you do not add a full frame that is braced. When you add this, it tends to upset the look of the trellis, so think carefully before using as a gate. As without the frame the gate will change shape over time!
Trelliage
The trellis here was primarily to separate the more formal ‘Front Garden’ with the more relaxed ‘Play Garden’ at the rear and side of the property.

To improve the strength of this gate we added metal framing at each corner, both inside and outside, it was only partially successful.

A black stained trellis gate If a more substantial barrier is required, say in the form of a structural wall to hold back a bank then there are a number of ways to achieve this.
Low Timber Retaining wall.
Here we used vertically set timber as a retaining wall. We did place a waterproof membrane behind the timber and a gravel pressure release drain. So as not to have unsightly stains running across the light colored paving.

Low timber retaining wall A quite pleasing effect can be achieved.

The softer low timber wall looks at home here. Roof Gardens
Roof gardens benefit from the light weight of timber. Its ability to be ‘modulised’, as can be seen here.

Low timber walls on roof garden Structural Timber Walls
Some years ago, now, we discovered. Well perhaps I should say a local native of our area wanted someone to test a new product he had found lurking in New Zealand. So, as we had won a number of awards for our work, and our teams were well known, he persuaded us to try this product.

Structural Timber Walls It was fantastic. Ok I should add some provisos, it is treated wood, it lasts a very long time, I have pieces from 30 years ago that are still unblemished. Maybe bleached a little but otherwise fine. It will twist if not constructed correctly, although it is unzippable and thus fairly straightforward to repair. If you introduce plants into the wall, it looks amazing. Infact the plants protect the timber.
Here’s a much taller one we completed.
It is essential to use a structural engineer to carry out the necessary survey, and calculate the design criteria for these ‘Gravity Walls.’

Once established they can look like this..

Planting covering a timber wall 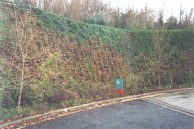
The timber wall blends in so well Some years back we were even asked to build a play area within a timber stockade. The posts were about 16 ft long and required some ingenuity to place correctly.

Treated timber barrier in play area Here’s how we did it..

Using a 4in1 bucket on a bobcat Moving to more decorative uses, let’s explore trelliage and low walls..

Wishing well feature with trellis back drop We sometimes add some whimsy to our designs. Here we used a rather deep drainage shaft, disguising it as a wishing well. To make it stand out we added a trellis surround to enable us to plant climbers to enhance the visual impact. Here its just been completed.

Pergola with Wishing Well at end of path Ornamental Trelliage
Here we used a cloud trellis to add some movement to the landscape. To help hide the boring stepped trellis in the neighboring garden.

Cloud trellis adds movement Here the trellis has been painted white next to the house it gives a very clean look.

Painting trellis white adds interest Here we had a custom-made heavy-duty trellis, note the pencil edges soften the whole fence.

Superb detail for trellis 
The completed trellis barrier Ann & I will spend a little time on the radio show talking about materials. When we interview our next guests who will be Designers.
In the meantime, do come and listen at Growing Trends
We would love to hear from you with ideas, comments, suggestions and requests…
Ann & Chris
Views: 308
-
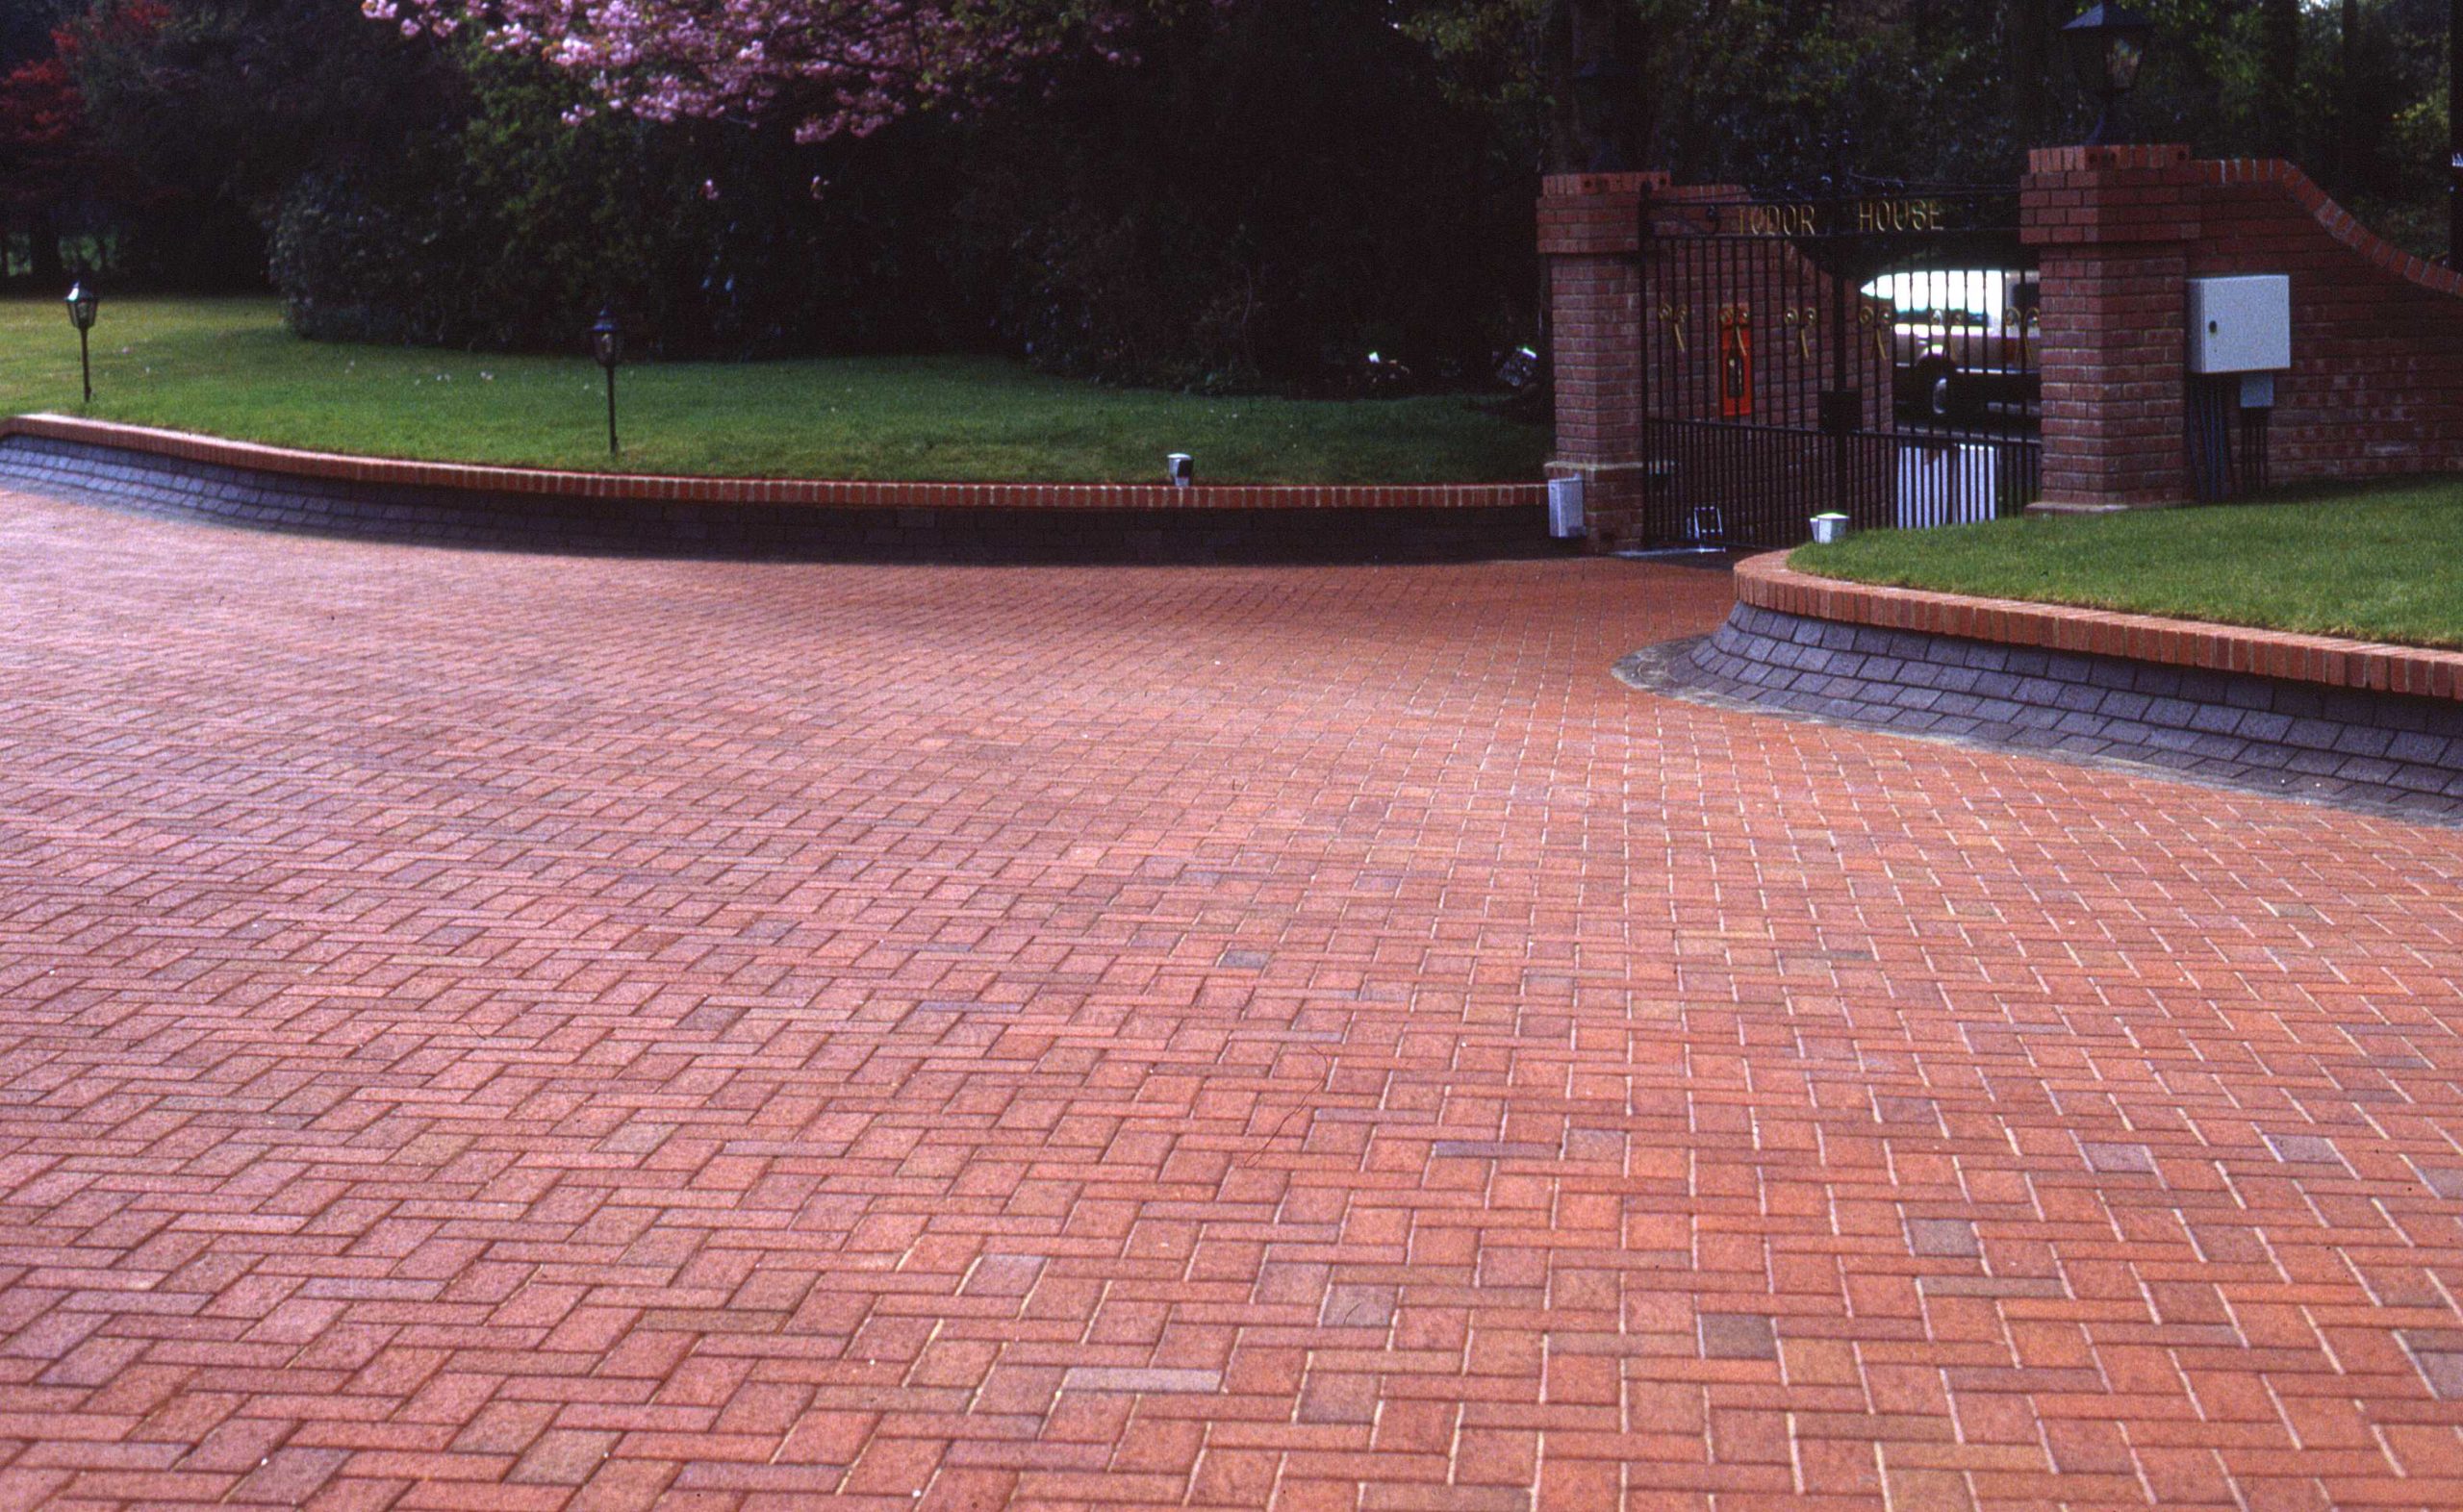
Dri-lay Drives
Dry – Lay Drives
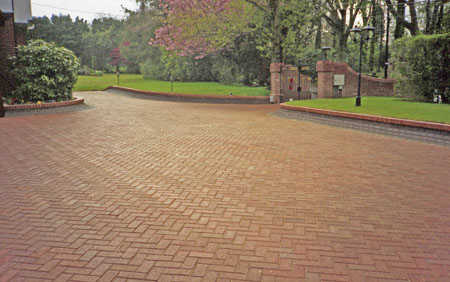
We developed ‘Designer Drives’ almost 30 years ago..
How it all started..
My partners and I had worked for a London Parks Department. On some of the projects we were working on, we needed to use a strong paving material. At the time Marshalls( one of our suppliers) were testing a product called ‘Monolok’. It had been developed in Europe for use at bus stops. To prevent the heavy buses sinking into the tarmac, on hot days. These ‘monolok’ blocks were of differing sizes and worse ‘z’ shaped. This made them a nightmare to design with.
They were though, a really clever idea. They interlocked together, without using mortar, this effectively meant they stayed in position, didn’t crack or sink, but could be ‘unzipped’ and then relayed – if say a pipe needed working on below.
One day our sales contact rushed in with some new ‘brick-shaped’ grey blocks. He told us red would also be available soon. Did we want to try them? We immediately saw an opportunity. Using traditional bricks with a mortar bed required a heavy-duty brick version, worse it took days to point … see below.

This particular in and out brick driveway took 10 man-days just to point the bricks. Whereas the drive below took 4 hours to ‘sand in’ with kiln-dried silica sand.

Saving so much time, significantly increasing our profits on each project. We were soon demanding new, more interesting colours.. here’s one using a brindle colour mix..
New methods.

It didn’t take us long to refine our own techniques. Adding our own recessed manhole covers. Canting the edges so homeowners knew where they were as they drove around their driveway. – The slightly raised edge looked great visually as well. Setting us apart from our competition.

Here a well constructed and cut in recessed cover… this time using a softer stock brick.

When well done it’s very hard to see the recessed cover, as in this picture.. there are two in the lower picture!

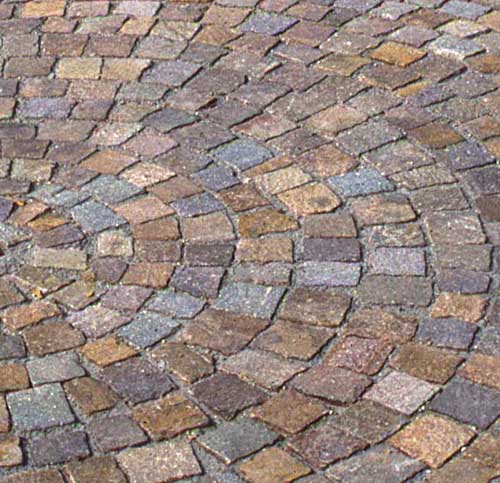
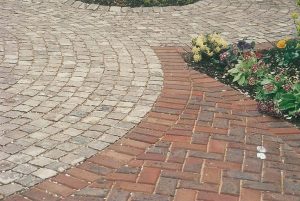
New layout pattern
We soon added a ‘fish- scale’ pattern using granite setts. Then a phorphery sett to our ‘Designer’ collection..
Here’s some granite…much more expensive but they look superb !

When using ‘natural’ products. Such as the granite and real bricks it is important to remember that they are often differing sizes. This means that it is very easy to lose the design module. If you have too big an area its important to have adequate changes in direction.
The stock bricks below work for about a length of 1.8m ( 6ft). Then you need to add a break line or the pattern will start to wander off.

Below is a combination of natural granite setts and softer stock bricks – my favorite by far!
Would you like to read more Landscape projects ? – More Award winning projects
We would love to hear your thoughts and comments
Views: 854
-
Privacy Planting a Garden Hedge
Garden Hedges,
Hedges are often used to create a boundary between sections of gardens. They can help lead you around a garden. Although often their primary role is to act as a privacy barrier. A hedge can be a very useful garden tool.
Personally, we’ve even used ones for security. BY choosing a suitably thorny subject, it can make it impossible for someone or something to get through the branches.
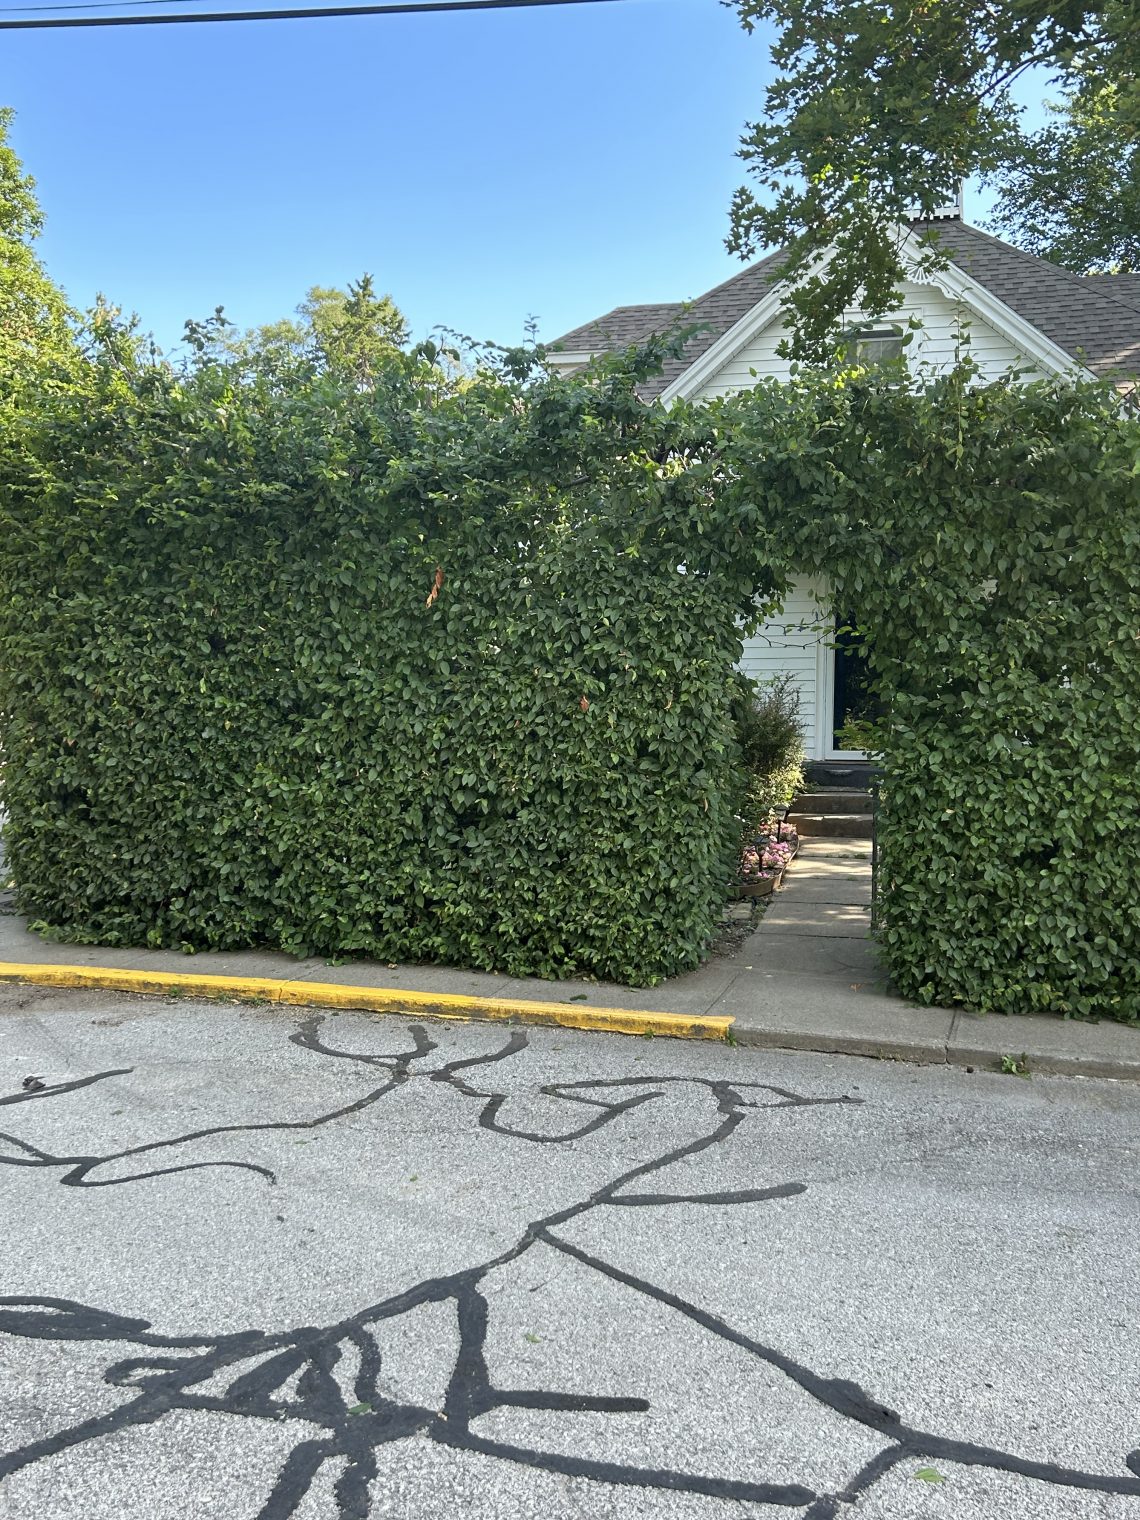
The picture below, shows a hedge being used as an entrance into a garden, creating some privacy and yet leading the eye to the main terrace doors.

A hedge can be grown using almost any plant material that will withstand constant clipping. The list of suitable plants is quite large. At the smaller end you have the traditional box hedging often used in kitchen gardens, or to surround ornamental flower beds, as seen below.

Types of Plants to use.
To create a less formal barrier, you could use forsythia – but remember that forsythia flowers on last year’s wood. So pruning and shaping should be restricted to just after flowering if possible. Hornbeam, Beech, Rose, Escallonia, Cotoneaster, Laurel, Yew, Leylandii, Thuja all make a nice hedge.

Of course the height you desire the hedge, makes a difference in choice of plants to use as well.

Heights of hedges.
The height is also dictated by how often and by what method is used to keep the hedge clipped. As can be seen below, this hedge would take many hours of work to keep it in this condition.

Trimming a hedge can be a simple job, with a handheld trimmer or a more serious project with lots big of equipment.


Clearing away the cuttings Views: 298
-
A natural stone patio and entertaining area
Patios & Terraces

A Brick and Stone Terrace
A lovely natural stone and brick patio, surrounding a conservatory.
Today, I thought it would be fun to show you a series of before, during and after pictures of a patio/terrace construction.
Mick and Steve who constructed this lovely terrace. Are extremely skilled craftsmen.
If you look carefully at the stone cutting you will see how ‘evenly spaced’ all the joints are .
Base Foundation.
It all starts with good preparation on a stable foundation. In this case around 100mm ( 4 inch) of graded limestone base well consolidated.
If the ground is moist or subject to shrinkage it’s a good idea to add a geo – fabric beneath the limestone.
Surface.
You should make sure the finished height of the paving, is at least 150mm ( 6 inches) below the damp proof course set in the house brick walls.
It is also a very good idea to create a fall away from the house to your drains, ( at least a 1 in 80 fall is required).
Also, consider the need for allowing moisture around the house.
If you are on heavy clay, it is a good practice to allow the clay sub surface to remain a little damp during the summer to prevent the ground ‘heaving’.

First the walls and steps are constructed. 
Note how clean the working area is. 
Here Mick is carefully, pointing the natural stone, using a semi dry mixture of soft sand/sharp sand/ cement. Make sure the conditions are dry. Then firmly point between the paving joints. 
Raised brick seating area 
The completed terrace, with low walls to enable larger groupings , for entertaining. The gently curved wall naturally leads the eye around the establishing garden Views: 155
You May Also Like
Creating mystery & intrigue with Timber Walls, Fences & Trelliage
-
A large green retaining wall
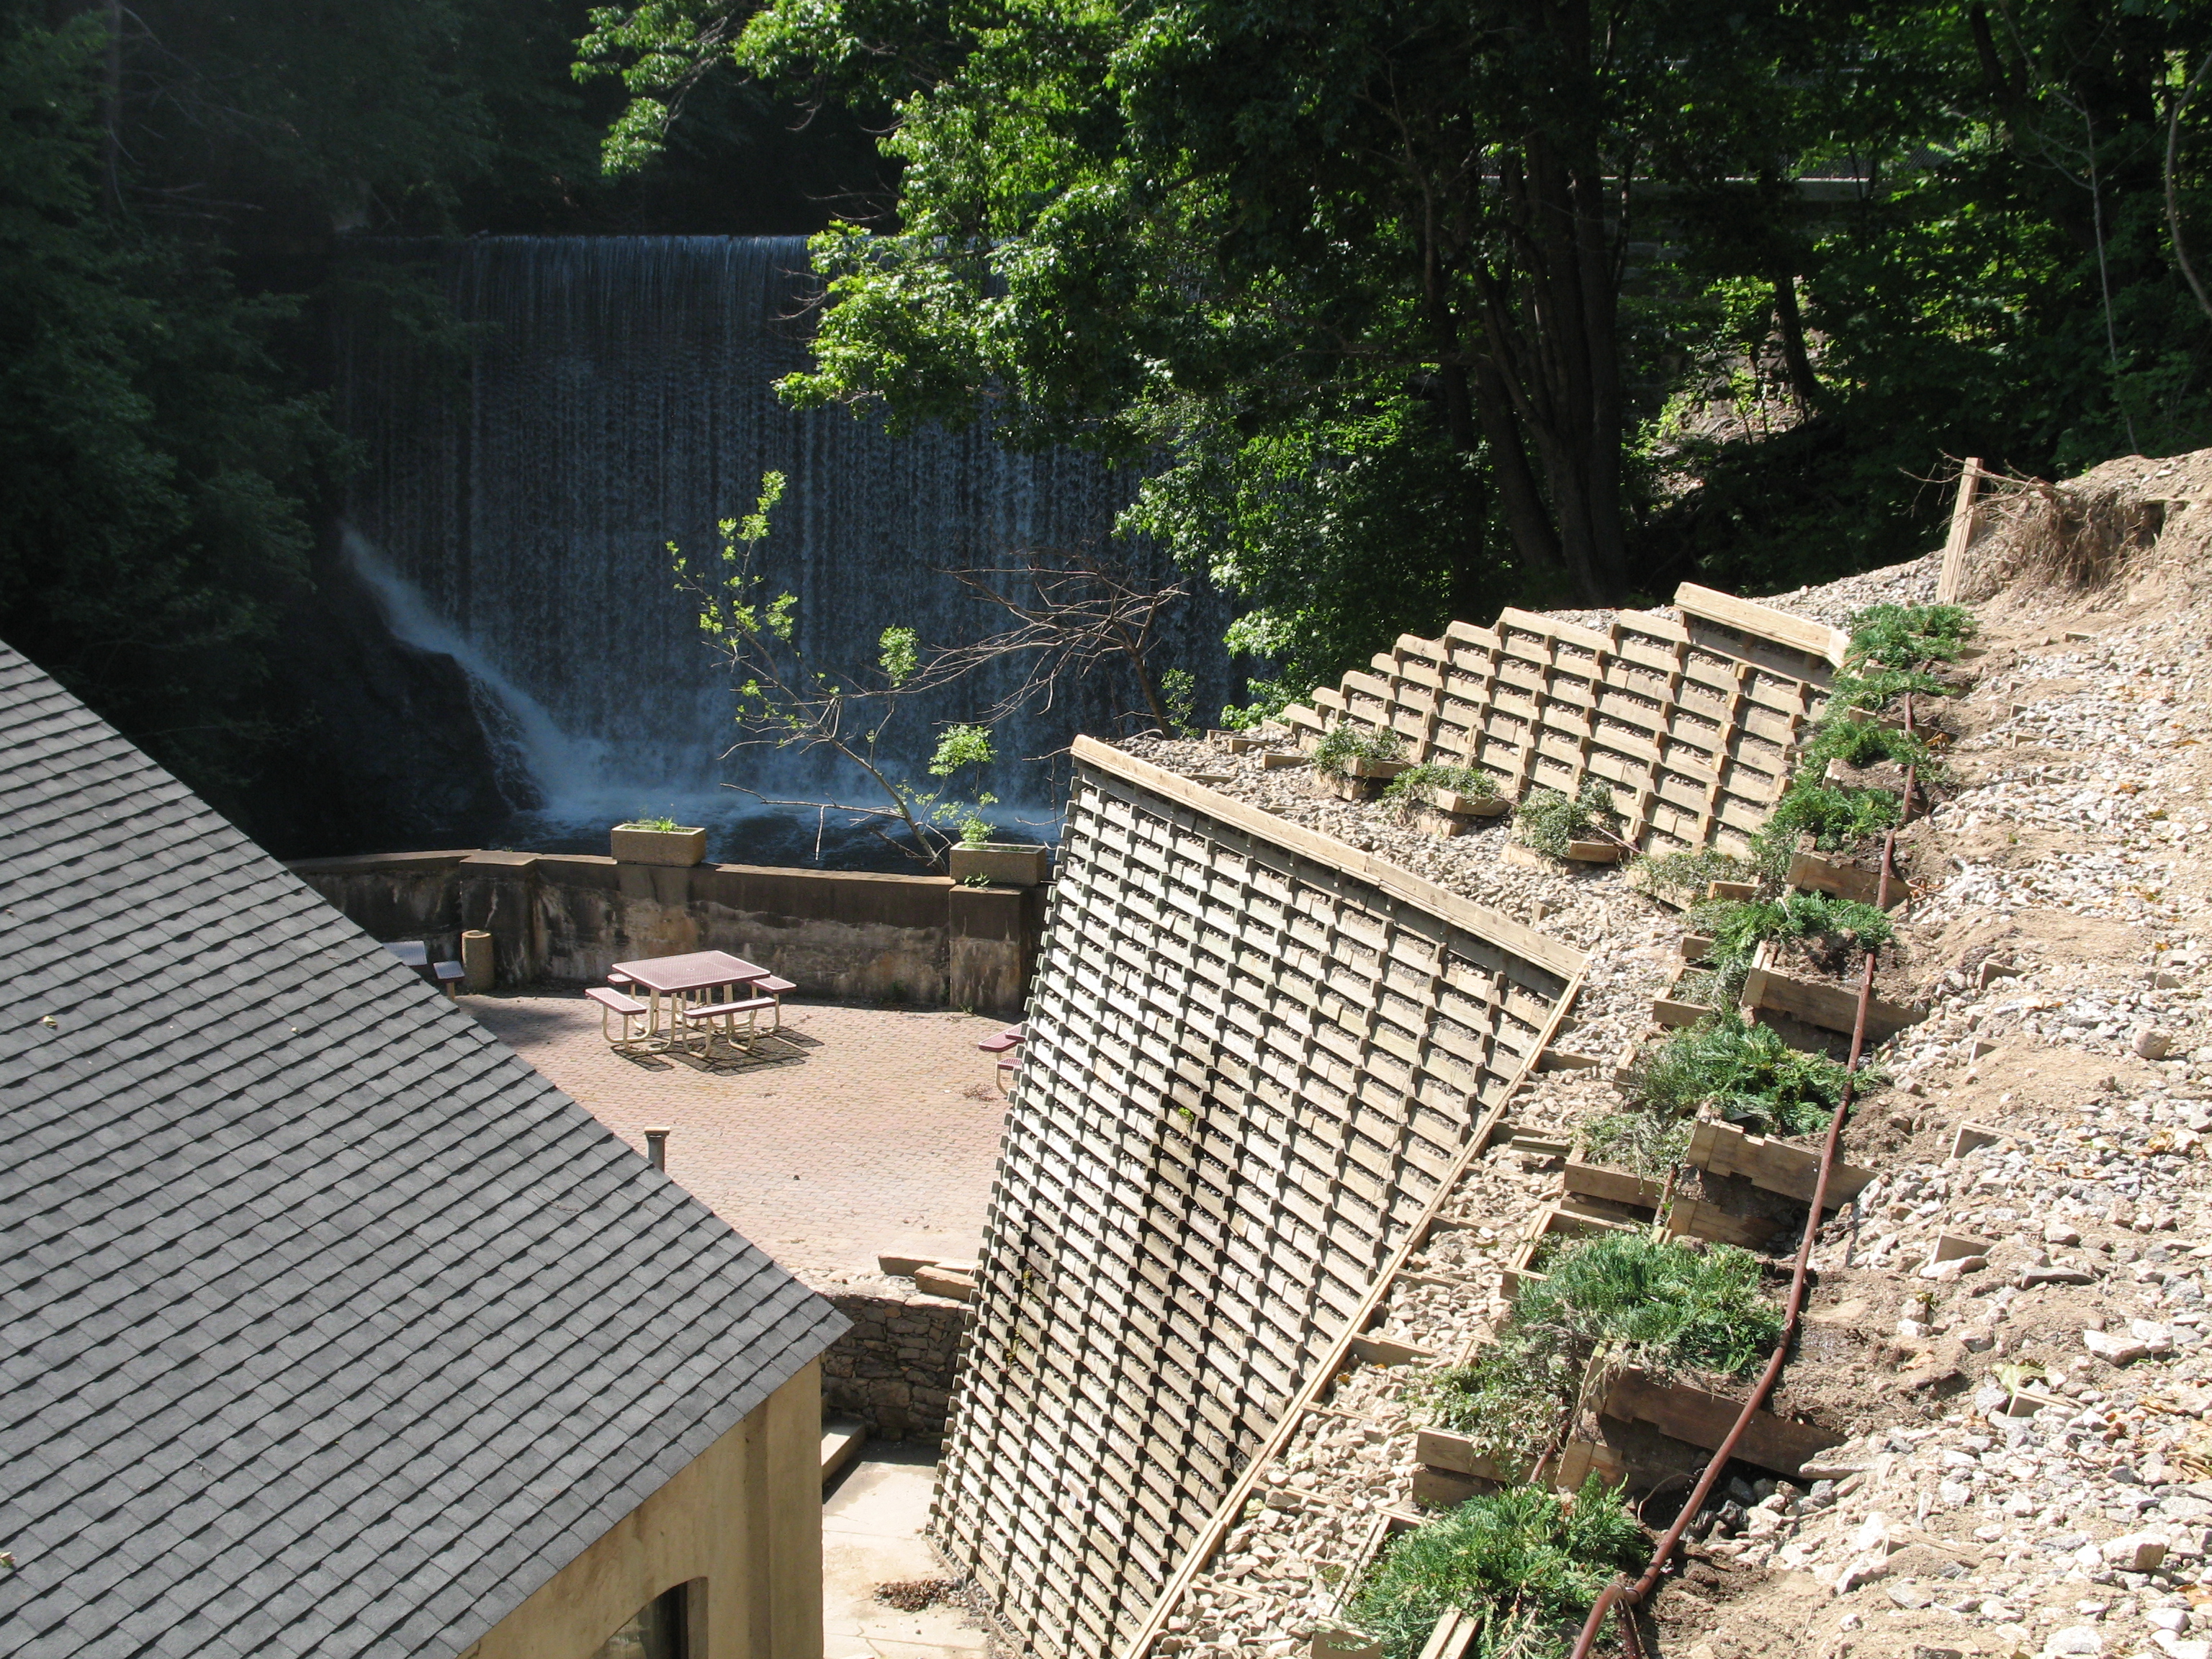
Fully retaining gravity walls can be made from specially treated wood..this one is 25ft high!

Treated Timber Gravity Wall 

These walls are quite easy to construct with a small crew, they are light weight and adaptable. We have found that adding small planting ‘burrito’ works really well. The timber weathers much better if covered with planting, it helps to prevent the wood twisting, the planting looks really attractive.

Here you see a green wall some years after completion

Views: 138
You May Also Like

Suffering from Allergies?