-
Creating mystery & intrigue with Timber Walls, Fences & Trelliage
Last time we talked about paths.
Today I thought it might be advantageous to discuss ‘Timber Walls & Fences’.
We will include Trelliage as they all have a role to play.
Helping to create a certain kind of mystery within a garden landscape.
We’ve discussed hedges recently, so you can scroll down to that article if you would like.
These ‘vertical materials’ are acting as a visual or physical barrier between differing areas.
This leads the eye on to a new discovery or perhaps just creating an interesting space.
At some time fairly soon we should add ‘Green Walls’ which are gaining in interest and can look absolutely superb.
I wonder how long it is before we develop these to grow vertical edibles ?
Having designed and built a huge number of gardens over the years. We have gained valuable experience in what works best in a given situation.
Using Timber.
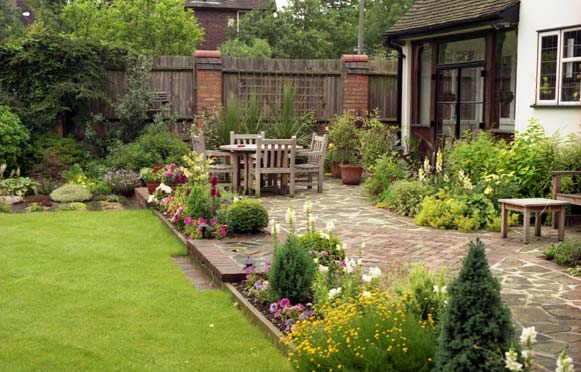
The garden below, was primarily designed to reduce aftercare. Taking care to keep the beautifully rustic boundary fencing, which blends in to both the surroundings and the new work so well.
It was necessary, to repair the odd arris rail, a couple of fence posts and some slats, re-hang the side gate etc. Overall by keeping the original fence the rustic feel was, I think, you will agree maintained.

Low hit and miss side fence with 6ft feather edged boundary fence & framed gate Start with what is already there.
It’s nearly always best to work with what is already there, rather than ripping out everything. My first task is always to look up and see how the tree canopy is. Then beyond the space we are working with.
To see what impact, we may be making without perhaps realizing how a neighbor might view our endeavors.

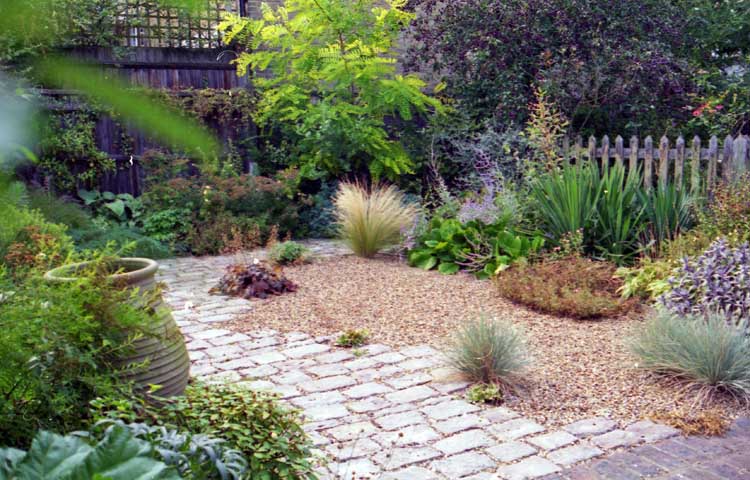
Very low maintenance, Mediterranean style In small gardens complete barriers tend to make the garden smaller. It is best to create more of an illusion of a barrier. This is often best created by using trellis. Here is an example that we stained black.
A word of warning, trying to make a gate from trellis is fraught with problems if you do not add a full frame that is braced. When you add this, it tends to upset the look of the trellis, so think carefully before using as a gate. As without the frame the gate will change shape over time!
Trelliage
The trellis here was primarily to separate the more formal ‘Front Garden’ with the more relaxed ‘Play Garden’ at the rear and side of the property.

To improve the strength of this gate we added metal framing at each corner, both inside and outside, it was only partially successful.

A black stained trellis gate If a more substantial barrier is required, say in the form of a structural wall to hold back a bank then there are a number of ways to achieve this.
Low Timber Retaining wall.
Here we used vertically set timber as a retaining wall. We did place a waterproof membrane behind the timber and a gravel pressure release drain. So as not to have unsightly stains running across the light colored paving.

Low timber retaining wall A quite pleasing effect can be achieved.

The softer low timber wall looks at home here. Roof Gardens
Roof gardens benefit from the light weight of timber. Its ability to be ‘modulised’, as can be seen here.

Low timber walls on roof garden Structural Timber Walls
Some years ago, now, we discovered. Well perhaps I should say a local native of our area wanted someone to test a new product he had found lurking in New Zealand. So, as we had won a number of awards for our work, and our teams were well known, he persuaded us to try this product.

Structural Timber Walls It was fantastic. Ok I should add some provisos, it is treated wood, it lasts a very long time, I have pieces from 30 years ago that are still unblemished. Maybe bleached a little but otherwise fine. It will twist if not constructed correctly, although it is unzippable and thus fairly straightforward to repair. If you introduce plants into the wall, it looks amazing. Infact the plants protect the timber.
Here’s a much taller one we completed.
It is essential to use a structural engineer to carry out the necessary survey, and calculate the design criteria for these ‘Gravity Walls.’

Once established they can look like this..

Planting covering a timber wall 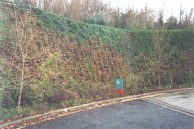
The timber wall blends in so well Some years back we were even asked to build a play area within a timber stockade. The posts were about 16 ft long and required some ingenuity to place correctly.

Treated timber barrier in play area Here’s how we did it..

Using a 4in1 bucket on a bobcat Moving to more decorative uses, let’s explore trelliage and low walls..

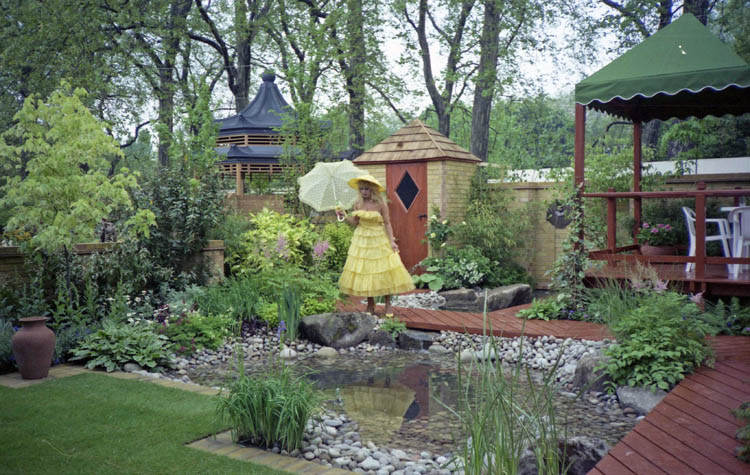
Wishing well feature with trellis back drop We sometimes add some whimsy to our designs. Here we used a rather deep drainage shaft, disguising it as a wishing well. To make it stand out we added a trellis surround to enable us to plant climbers to enhance the visual impact. Here its just been completed.

Pergola with Wishing Well at end of path Ornamental Trelliage
Here we used a cloud trellis to add some movement to the landscape. To help hide the boring stepped trellis in the neighboring garden.

Cloud trellis adds movement Here the trellis has been painted white next to the house it gives a very clean look.

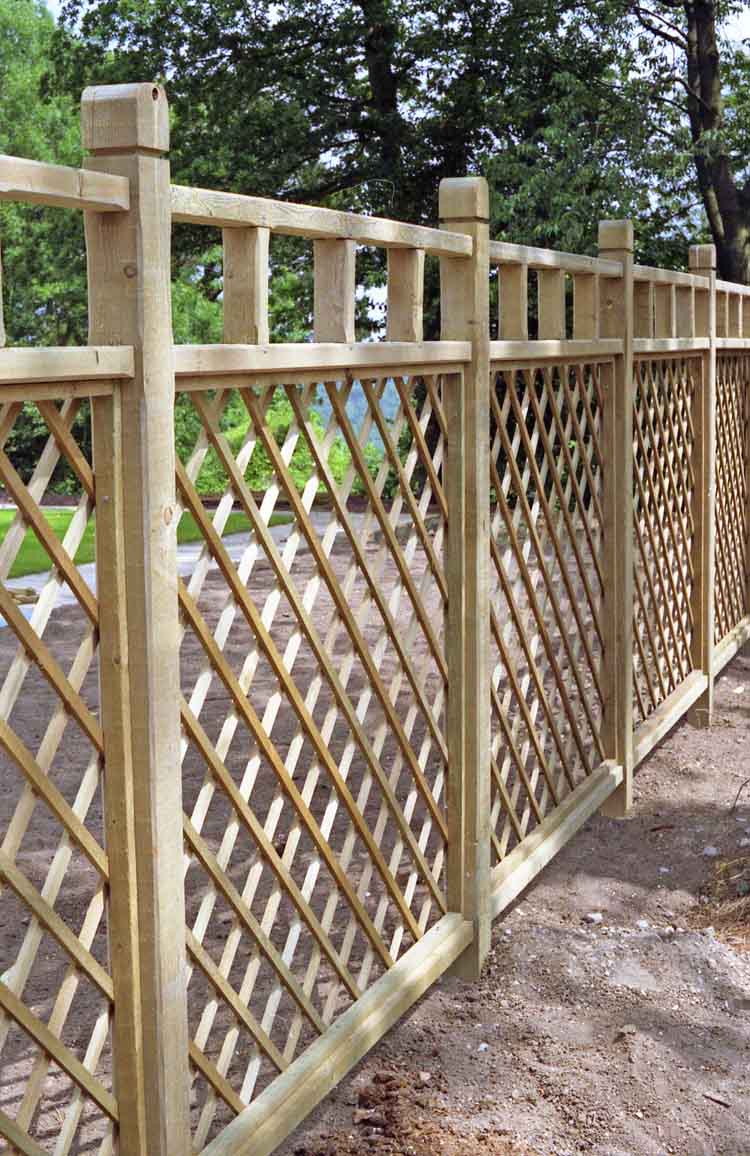
Painting trellis white adds interest Here we had a custom-made heavy-duty trellis, note the pencil edges soften the whole fence.

Superb detail for trellis 
The completed trellis barrier Ann & I will spend a little time on the radio show talking about materials. When we interview our next guests who will be Designers.
In the meantime, do come and listen at Growing Trends
We would love to hear from you with ideas, comments, suggestions and requests…
Ann & Chris
Views: 308
-
How it all began……..

Beautiful landscapes take time, professionalism & commitment, from the owner, the designer, the builder and the maintainer.
Unlike almost any other purchase a homeowner can make, an external project involves nature, nature has a habit of seeking attention often !
So let’s take a moment to walk into my life as they say.
There is a well known expression ” The customer is always right” – this is very true. It is essential to build the customers trust, and not lose it, for once gone events have a habit of sending everything as we say ‘Pear shaped’ …. today, let’s stay positive and explore some experiences….
I only know ‘My’ experience, which to be fair has been fairly extensive, as well as fun, over all very enjoyable, with the odd heart stopping moment, which we will discuss later.
My school days, yes ,I was privileged, were at Bearwood College, it’s a school in a beautifully laid out estate. Designed by The Rev Gilpin back in the early 1800’s for John Walters the founder of ‘The Times’, – some 500 acres, at school we were expected to do Estate work on the huge grounds once a week to help maintain the appearance of the school around the mansion house.
So as a youngster for 2 hours every week we played at aftercare of a huge Estate – I’ve just interviewed a colleague who did this for real as a Head Gardener of a 12000 acre estate, with among other things a 44 acre formal garden, this after years of designing spectacular award winning gardens, it’s a fascinating interview, as the estate is probably the busiest in the world with many events attracting over 100,000 visitors at a time, there is a motor racing and horse racing circuit within the grounds ! – you can hear Alan shortly on Growing Trends Podcast

During my vacations to earn additional pocket money for school – the Tuck Shop was stocked with all things fattening, that us kiddies always preferred to real food ! No just kidding.
I worked with a friend in his dad’s business of Forestry – we planted new woodlands in the winter break, did more planting in the spring break, then weeded the newly planted woodlands with a long handled hook in the summer break – it was heavy work but very rewarding, the ploughman’s lunch with a pint of shandy at lunchtime sitting out in a pub garden in the summer was glorious, however toasting your homemade sandwiches over a small twig fire in the depths of winter, cold, soaking wet, drinking peppered hot bovril wasn’t quite the same, especially as your toes were on the verge of frostbite !
Even the summer days had their own special moments…
“That is until you came across a wasp’s nest buried in the ground in your row as you cut down the foxgloves, brambles, and other assorted weeds a swarm of angry wasp’s chased you along your row, which I might add was almost always a vertical hillside ! The really scary one was, when a pheasant launched itself at you as you almost chopped its head off ! It used to take me a few minutes to calm down from that – you never ever hit the bird, or really saw it, but you sure heard it, and it was a huge blur as it flew past you.!”
After leaving school, working for a year at an Estate Agent’s introducing clients to property investments, helping sell houses and commercial properties all around the Thames valley.
I heard about a new landscape course at Merrist Wood College, was accepted, and spent three years really enjoying myself earning a College Degree in the process !

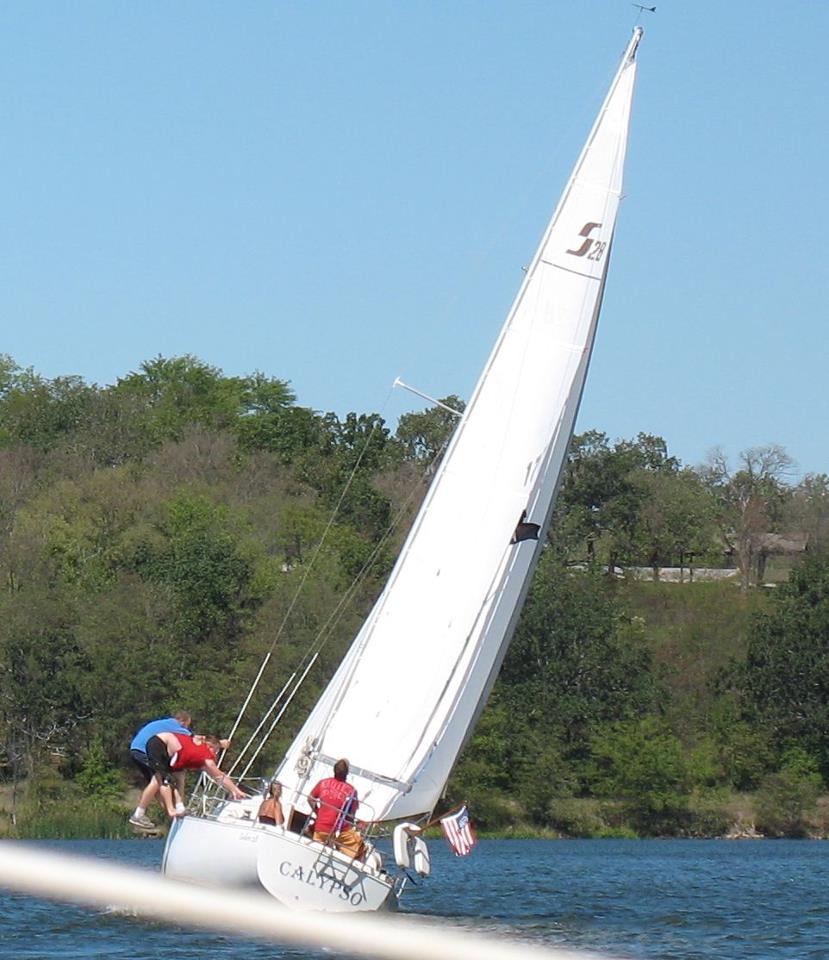
The course was so good, everyone of us was head hunted way before the course finished, well, now that I come to remember Bill, he had the new MGB sportscar, decided to buy a yacht and sailed off into the yonder, never to be heard of again !
Subsequently I discovered how much fun it is to have a yacht and go sailing !
I spend a further three or four years in a London Borough’s parks department learning some serious construction techniques – they called us Landscape technicians. There were six of us, in the group, when four of us left and the fifth joined the ranks of the clergy, one of the original six is still there so Ian must have 43 years of service ! It took almost 12 full time jobs to replace us !
We learned a huge amount, it was a great place to learn, with lots of variety, seriously engineered construction techniques, a dedicated to us work study team, so we knew how long items took to build.

Overall though it lacked the ability to really expand ones horizons, beyond parks, open spaces & schools, so after three years it was time to move on.

Private practice was a completely different place, armed with the knowledge of how to build to an exacting commercial standard – something that held us in very good stead as we built our company, we did something probably unique at that time, we deliberately concentrated on Design and Build we won one award after another, ( currently 17).
We achieved this mainly because we created a standard working method, for our staff, we used standard details that we documented,. Most importantly we loved to experiment with new ideas.

No we didn’t do this ! This is a planning ‘item’ in Oxford, but I bet you took a couple of looks at it !
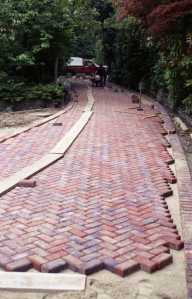
One of the first A-ha !!! moments was Dri-lay drives, it happened because a client asked for a brick drive with a dark mortar joint.
We duly designed and installed the drive – which took two men 10 days just to point by hand !. This seemed a waste of potential profit , so recalling our local authority days the next one we tried was with the dri-lay method we had used in parks, the very first project saved us over 50% of the normal time to complete !

One of the design features we added, was a ‘canted’ brick edge, when ever possible this served two purposes, it was visually very attractive, catching the eye, creating a visual movement.
More importantly for the housewife, it was a superb aide memoir when driving onto as if you got too close to the edge the powered steering ‘tweaked’ enough to prevent you from driving into the landscape – this produced lots of customers from recommendations..
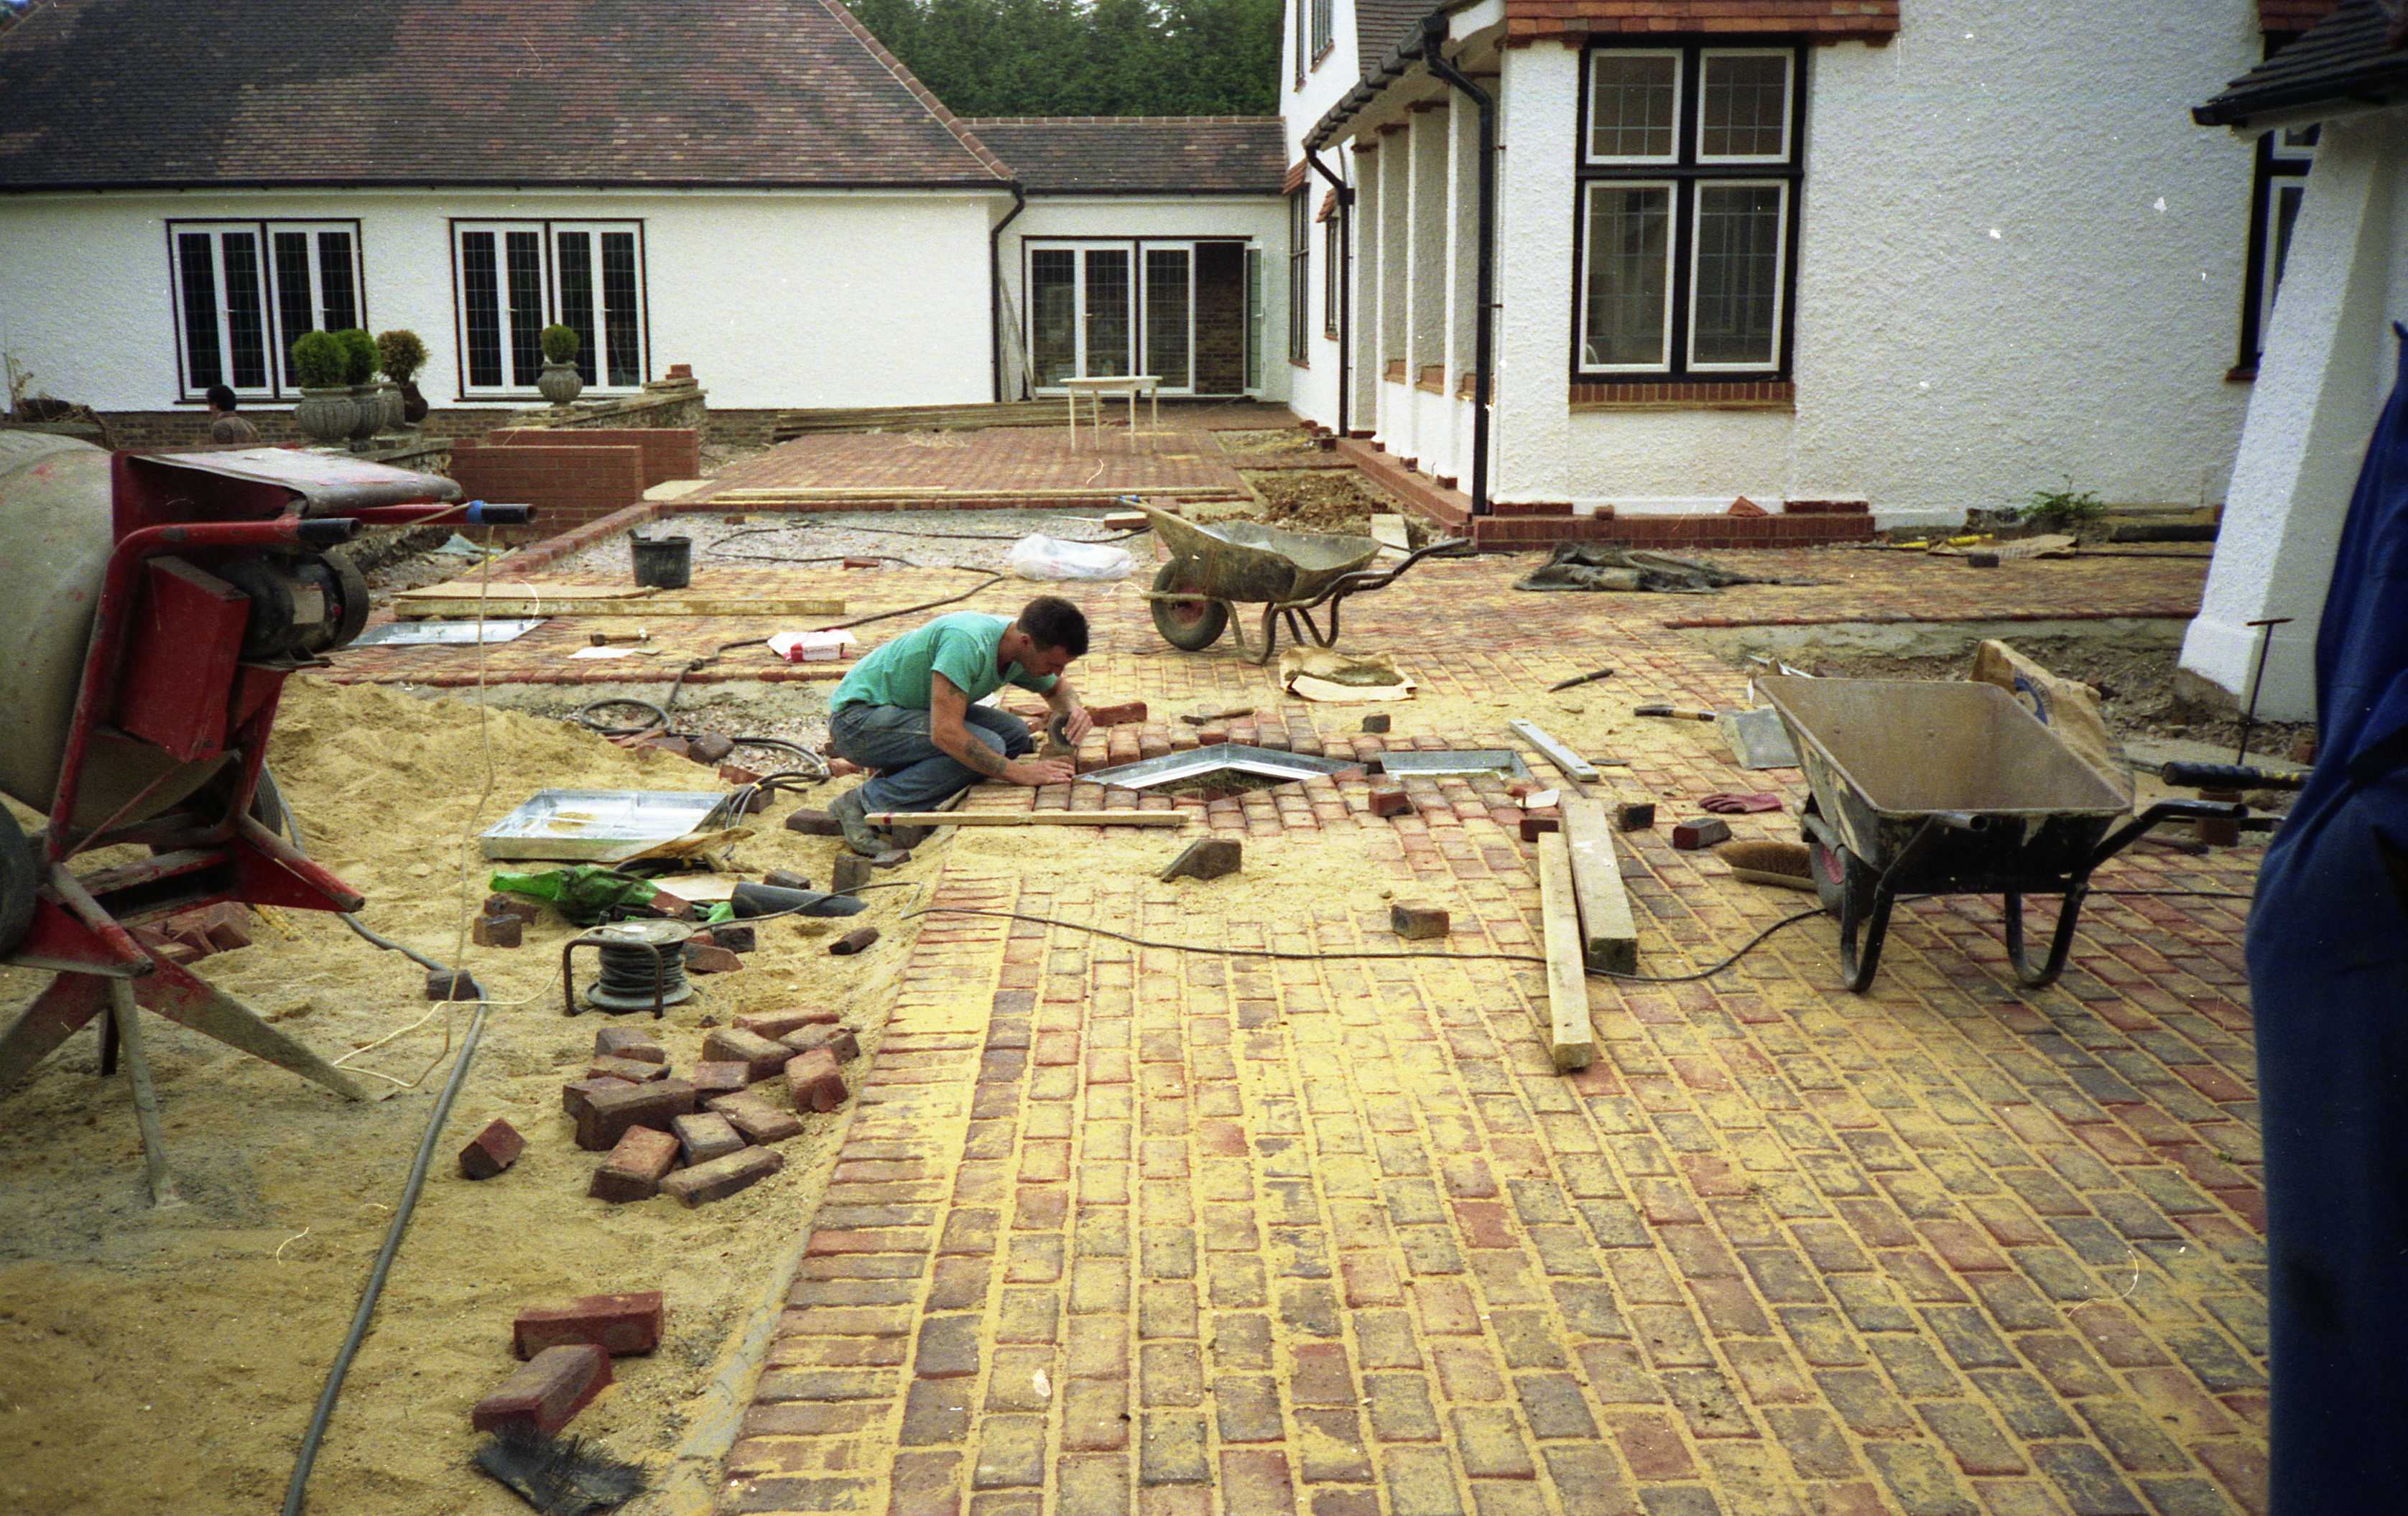
Below you see the first ‘dri-lay’ natural brick drive, we used a harder brick at first as the clay bricks tended to snap if you applied too heavy a vibration – after a while we figured using a rubberised mat would alleviate this issue.
The bonus to us, the first drive took 2 weeks to complete, this one was finished inside 4 days !

I well remember driving to a large concrete manufacturer of paving and blocks in 1984 and asking for help with our advertising budget – in those days the firms would pay a percentage of your advertising if you mentioned them. Anyway we went up to Derby from London ! gave a presentation on ‘Designer Drives” , it blew them away and we were politely told that the market didn’t exist. – a year later we had 5 crews constantly working building Dry lay drives, so many firms were starting to see the market potential. that we moved up to bricks.

By then we offered Block Drives, Brick Drives and for the really discerning Granite Sett drives – I have to say a granite sett drive looks quite exceptional
We also learned a valuable lesson, as we didn’t want to just build drives, we broadened what we offered clients, adding canted brick edges, specially designed recessed manhole covers, multi coloured drives- which then became ‘brindled.’ As the manufacturers caught on.

Pictures of our drives appeared on advertising brochures from those very companies.
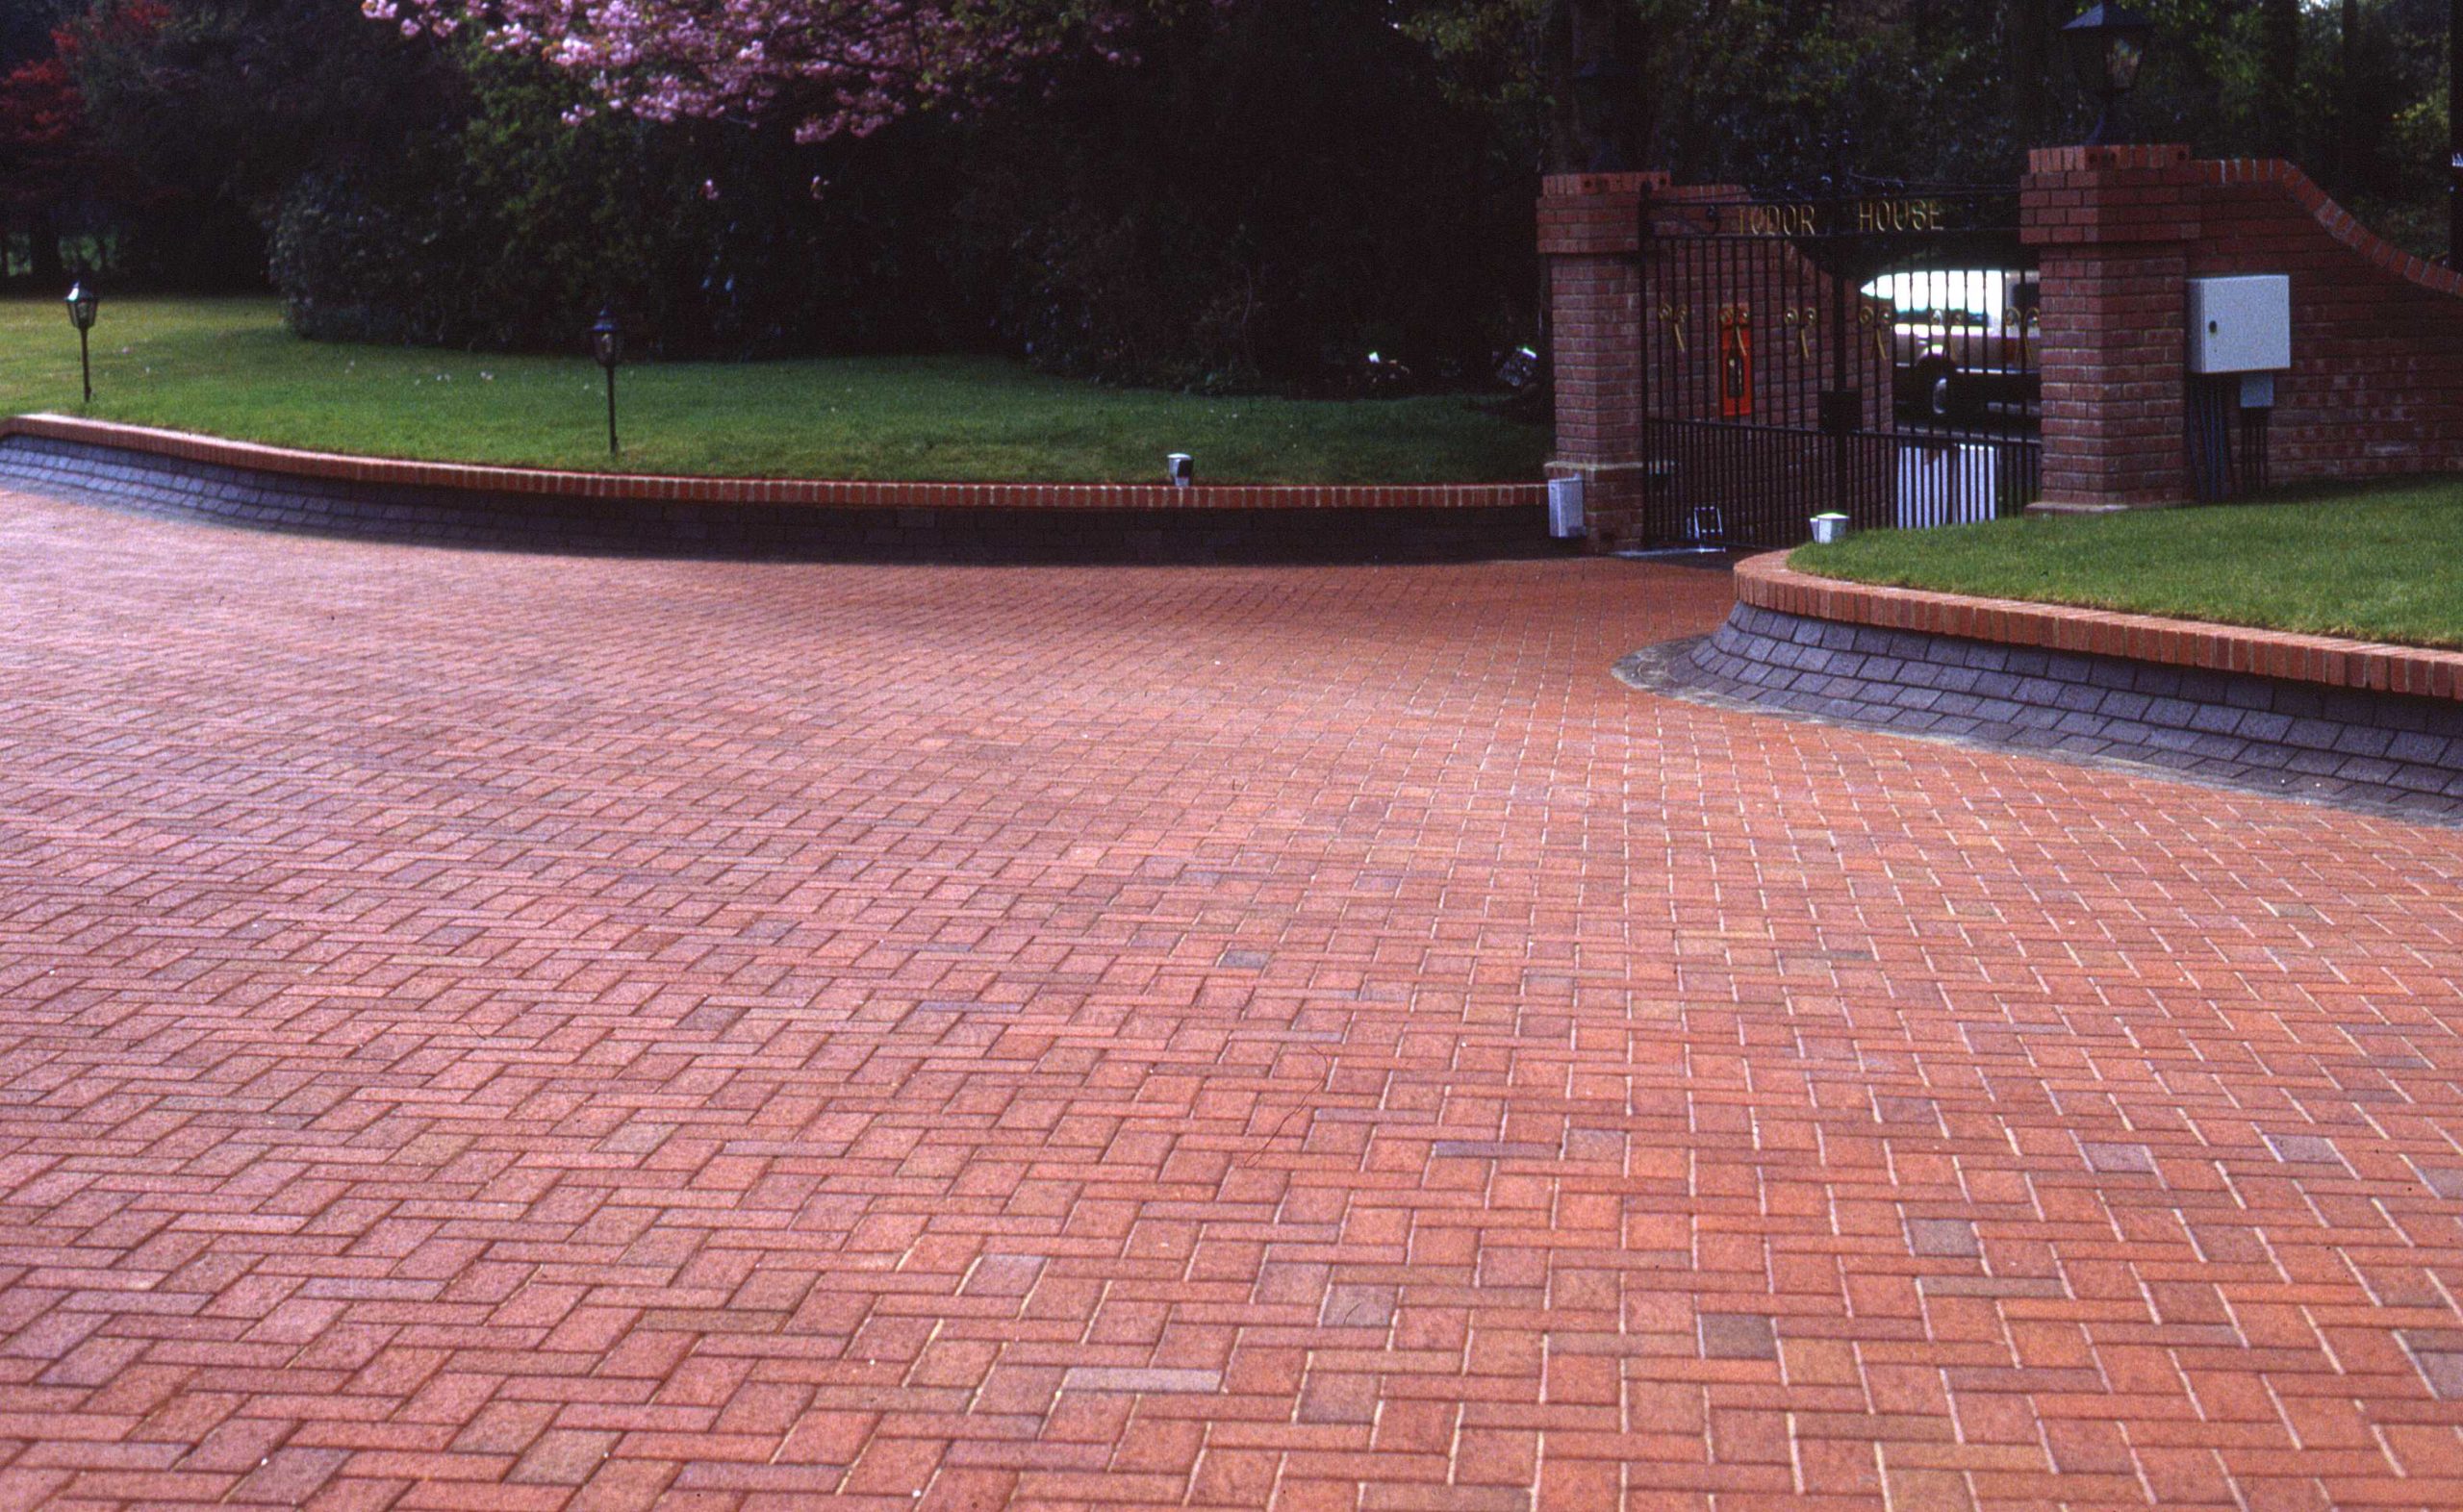
Our next Aha !!! moment was the recessed manhole cover, which we made ourselves at first..

See if you can see the second one in this picture above! This project was one of the first where we used a specially made stock brick the yellow is the kiln dried sand we used to brush between the interstices.

and the final result ..

We designed & built lots and lots of drives…100’s of 1000’s of square meters in area.
We learned some valuable time saving lessons, the best looking was always bricks laid 45 degrees from the road direction, they took longer and required much more cutting, so warranted a slightly higher charge, but they almost always looked better.
Natural bricks are not a standard size, so after about 6 ft (1.8m ) of one direction the joints tend to start running out of line so be careful how you set out. Oddly 45 degree herringbone actually helps to hide this visual effect.

I have to admit that it has, and continues to be, an awful lot of fun and enjoyment, not to mention the satisfaction that comes from achieving a well thought out and attractive scheme, or seeing a client years later saying how much they have enjoyed what was done, how well it has lasted.
A case of “Quality is remembered long after the price has been paid.”

I’ve always adopted a slightly different approach with private clients as I felt that most were not highly conversant with contractual law, or quantity surveying, always striving to give sound , honest advice, and maintain a high quality finish no matter what….

How is it that some projects just look wonderful and others just ok ?
The answer is in the detail and the finish.

There is also no doubt in my mind that, the more experience one has, the greater the ability to be able to produce , not only an award winning scheme, but also to ensure that the design is both workable and economically viable – of course if money is no object ? – I have personally worked on a few projects where money was not part of the equation, oddly they didn’t work out any better than a well designed and thoughtfully implemented scheme.
Some more A-ha !!! moments later , especially as we have grown longer in the tooth, we become smarter and now obtain patents for our “A-ha !! ” moments.
In the meantime do listen to our interviews at Growing Trends
Drop me a line if you have a question or request.
Chris
Views: 139
-
So what’s really new today in landscape work?
Looking back over a good few years, it seems to me that only a few things have changed.
Mostly the changes are in office equipment,our office wasn’t particularly fast to adapt to CAD or computerised pricing, ( which as I recall we started in earnest around 1990) we didn’t produce thousands of drawings, although with three full time designers we might have been able to complete our standard detail book quicker.

What we did have, which was invaluable, was a huge collection of standard minute values for thousands of manual site operations, gathered by a group of work study techs who followed us for years.
These values are still useful today, as I’ve found a ‘rate’ for a job is no where near what the job costs with overhead & profits or is worth in every situation.

Oddly, when you take a real look, it seems not too many on- site tools have changed very much over the years, the hammer remains the same,the pick, the saw, the rake, as does the garden fork, the trowel, the cement mixer, the plate compactor – all are virtually the same as they were years ago.
The one exception being perhaps the Dingo or it’s derivative…

This picture is a classic example, this car park in Kent was being resurfaced in 1978, the equipment although not lazer guided isn’t far removed from today’s.
Engines, drive trains, hydraulics, not that many really new tools, and a few altered methods, such as rotary grass cutting, self sealing sand, geotextile fabrics, and the use of plastics have all appeared – Some , I wonder for how long?
Is it time for a revolution in equipment ? if so, I wonder what will appear ? or has the demise of manufacturing reduced us to just accepting products that are derived from abroad ? Do you have a wish or an idea?
I suspect the humble wheel will take some beating over the next generation.

As a Landscape Design & Build professional, I’ve visited literally thousands of homes over the years, talked to the owners, sold them on design & build, managed the project , with a fantastic team who helped us win a large number awards.
As a Landscape Contractor, I’ve read, priced, won & lost , then programmed, then managed thousands of projects designed by other companies or individuals, with the team still winning a large number of awards in the process.
There have always been the same few common traits.
An agreed Design was produced, with an agreed priced Bill of Quantities.

The Designer kept in touch with the project until completion. – you can see him just in this picture below.

After working a little magic ! The Foreman, was in charge of the site ( our man on the site) stayed on the site with his team,until the project was completed.

We paid particular attention to detail, keeping the sites clean & tidy.

The client made stage payments to an agreed schedule.
We avoided extras, unless they were essential.
We under promised & over supplied. – the weather was almost always the one item we were unable to control.
We sent our aftercare folks in to show the client how to keep his newly paid for project in good order – irrespective of if we had an aftercare contract. ( Finished photographs are great for the portfolio and are easier to take if the site looks great, plus we treated every job as a potential award winner. !)

Sometimes I would call in and cut the clients grass to get away from the office. We were rarely the cheapest price available, we & the client knew this, we did have a professionally staffed office, we employed our own designers, landscape architects, contracts managers, and building staff who were all fully equipped, with all the necessary tools and machines.
We avoided heavy machinery in gardens preferring to use tracked equipment that didn’t compact the ground too heavily, we hardly ever used ‘Bobcat’s’ , but always used min-360 excavators, and tracked carriers.
The mini-tractor being the exception as it was so useful, perhaps with the advent of the dingo that’s not the case anymore ?

When we installed irrigation we preferred to use hydraulic powered horizontal augers which left almost no mess.

This system was really effective, it used an air compressor, but was able to pull the pipe back through the hole just formed, it worked great with Toro 300 series heads for example.

We preferred to work with natural materials ( like bricks, timber, natural paving cut to rectangles) to artificial ( concrete, concrete blocks, plastic, etc.,)

We always kept the conversations semi formal whilst the job progressed, not becoming too familiar was a huge benefit at times. Once the project was finished we relaxed our formal approach.
It wasn’t possible to not have misunderstandings on occasions, however we documented everything, and on the very rare moments when clients became agitated we gently showed what had been agreed and how we could adapt this to their new wishes – we always remembered that this was our job, we were the experts, but it was their project!
We often acted as Designer, Surveyor, Builder and Quality Controller for the Client, who often had scant knowledge of construction issues, so we tended to be much more, should I say tolerant in these situations.
If we were dealing with fellow professionals, then we played hard ball with the best of them !

Ann & I have started a radio show where we interview Clients, Designers, Creators, Maintainers, and the experts that help them, you can listen to a show here or even download for later – Growing Trends
If you would like to be considered for a show, do drop us a line and tell us why, we are now heard or read in 43 countries !
Ann & Chris
Error: Contact form not found.
Views: 85
-
Could we ask for a little help from you?

I’ve been really surprised at all the positive comments the site has been generating from everyone – Thank you all so much, it’s fun to write, improves my awful spelling, maybe my grammar as well ?
You can let me know on that one !
Some of you asked if I would make it possible to donate on this site, I’ve tried to avoid that, as well as adverts as I was trying to be impartial, with the content.
As you may know we do have a fun internet radio show, where we interview folks from around the globe about their Gardens & Landscapes.

Find some inspiration for your Yard today… When we started this radio show the aim was to find interesting people who had a passion for their Garden or Landscapes. Little did we know what would happen. In just a few months we have an audience stretching across the globe in 43 countries.

We soon added a web site www.grotrends.com to provide details of schedules, information on guests and sponsors, and a growing information area with details of techniques, ideas and examples of projects.

The show Growing Trends concentrates on the clients, the designers, the creators, the maintainers and the experts that help them, we would welcome any suggestions on who we should contact – the schedule is filling quickly, which brings me on to how you can help.
We have two one hour shows a day seven days a week, with a little funding help we can update the interviews more often, and tell the story of you, or your friends work, or your garden or landscape.
Can you help us in just a small way ? Contributing just $5 ?
Here’s the link to StartSomeGood the crowdfunding source we are using for this fund raising campaign

Growing Trends is fun, friendly, informative, interesting, amusing & entertaining.

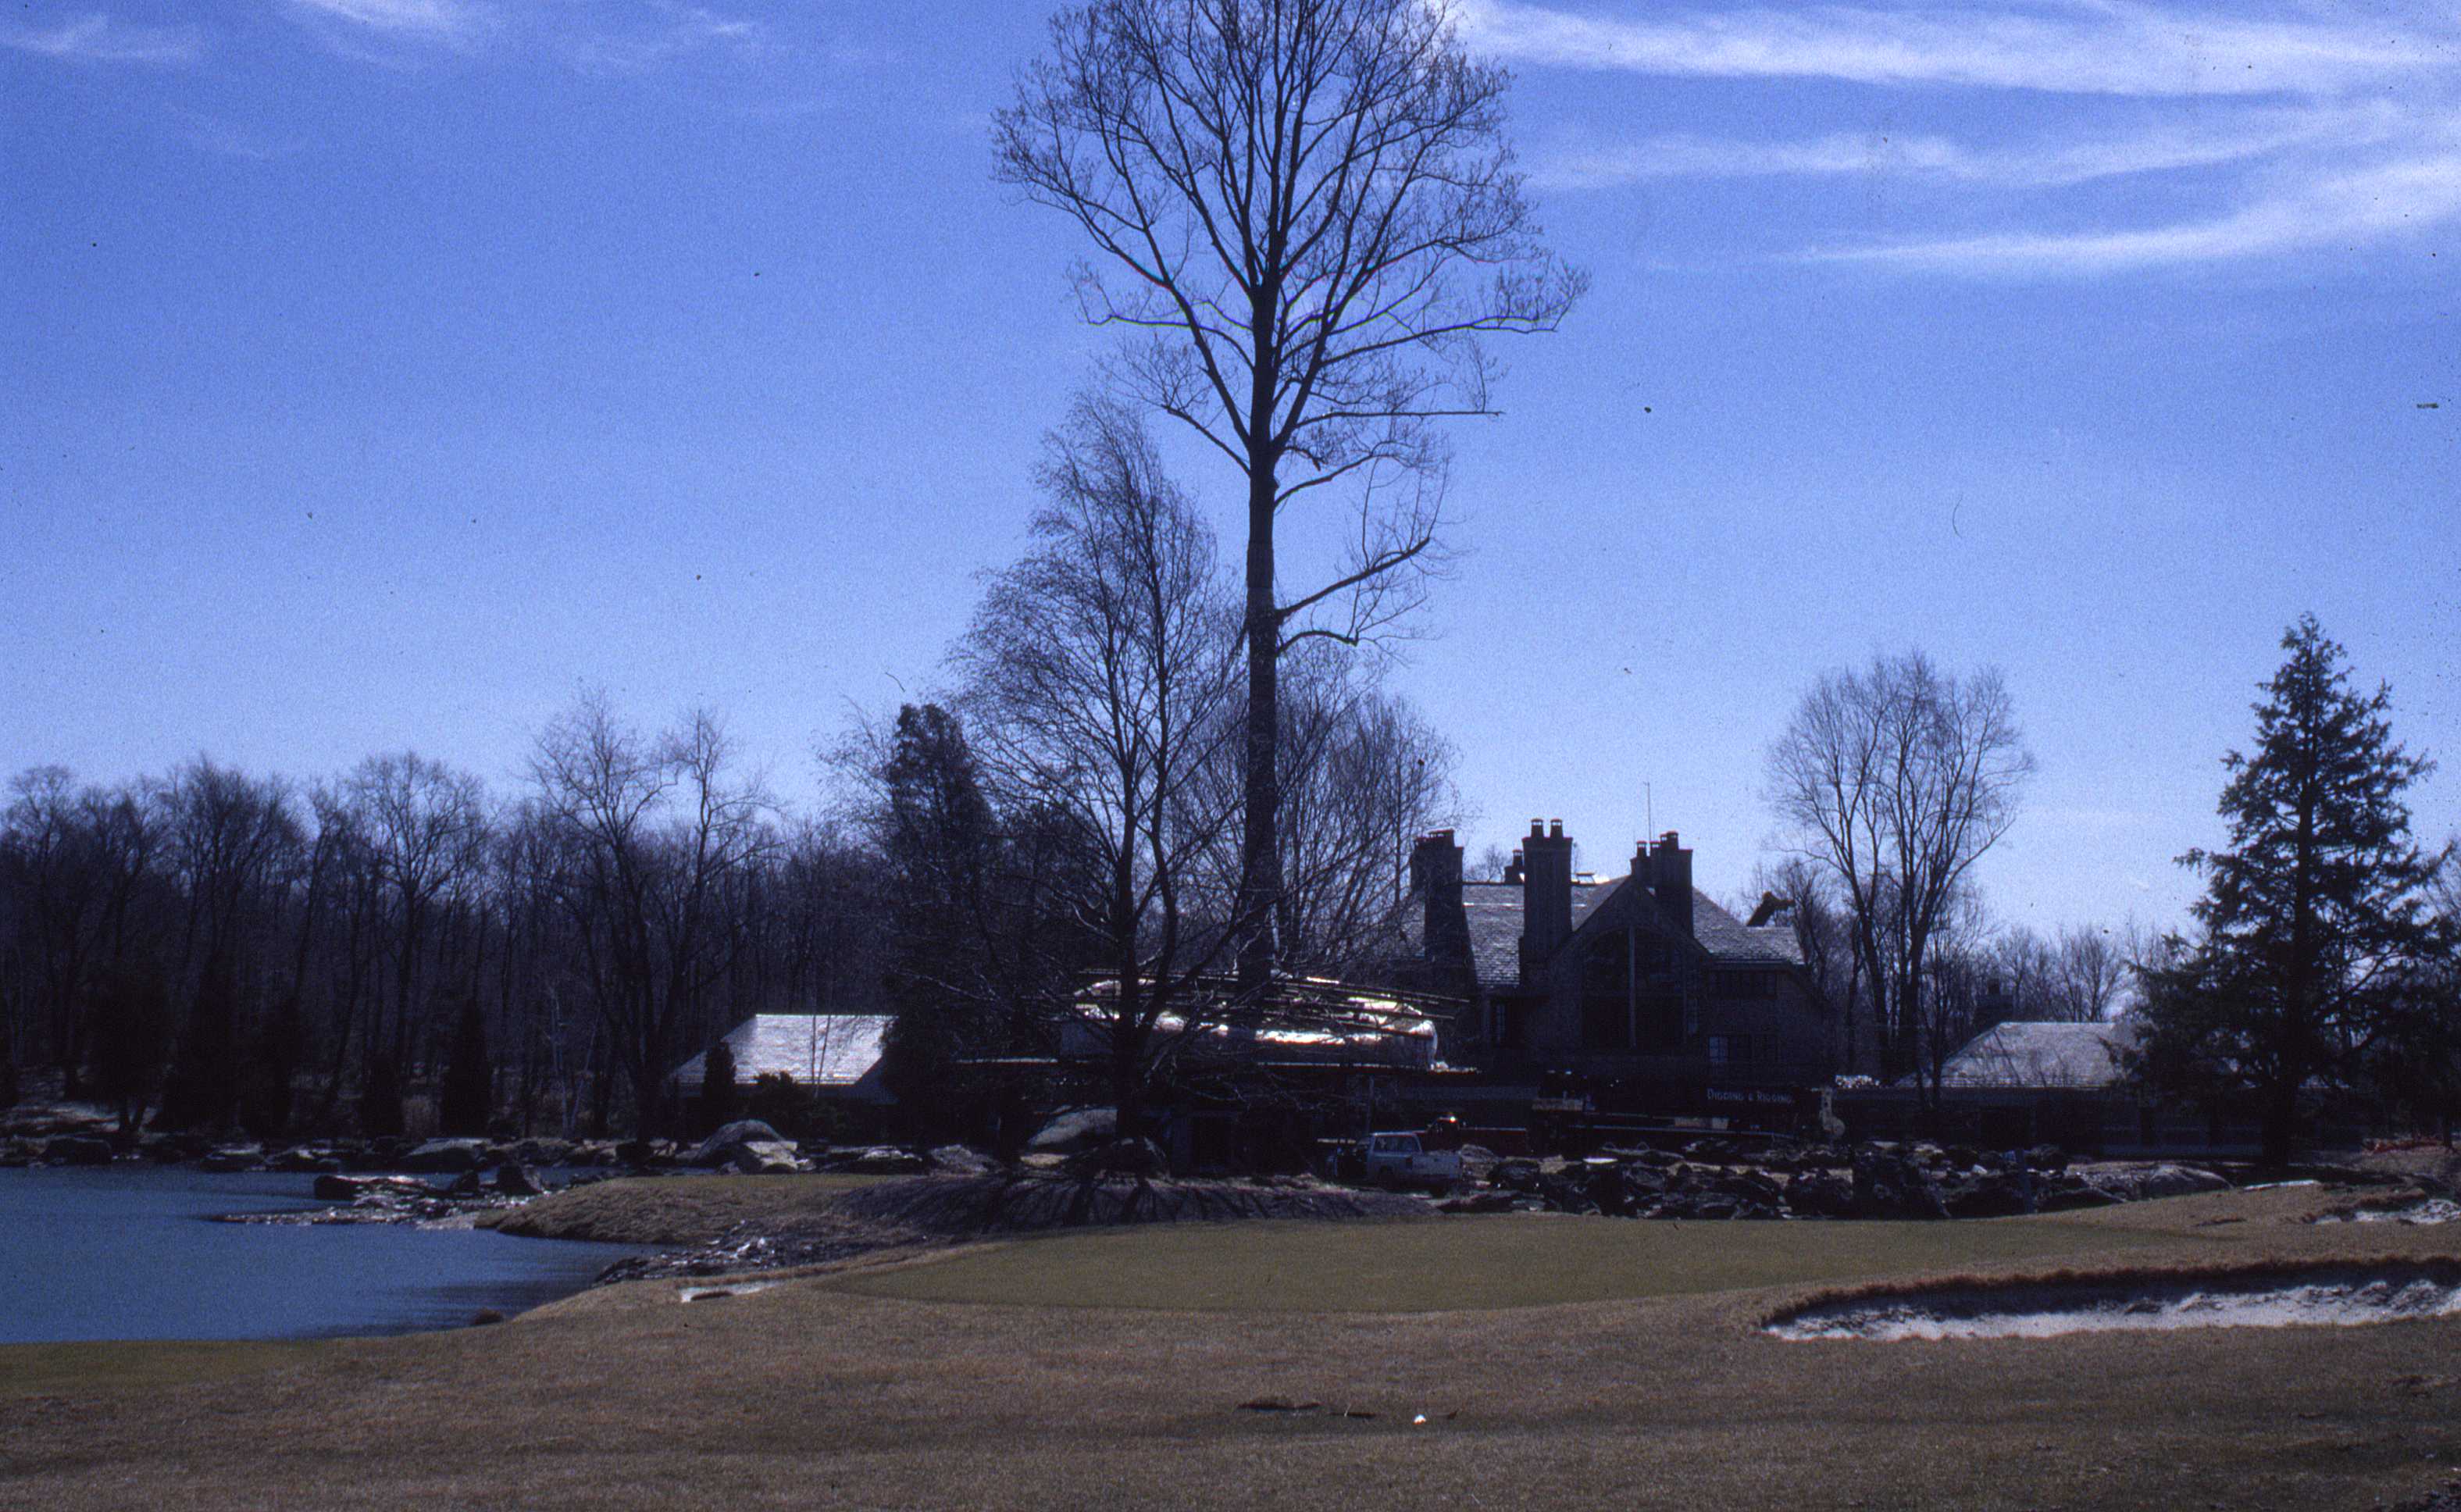
This one acre pond has a water change almost once per hour !
A final interesting project from just outside New York. This fully structural gravity wall is almost 27ft high !

Note the access is less than 4ft !
We really would appreciate your support, so we can interview maybe you, or your colleagues or friends, across the globe – thank you all for your support & comments.
You can also find us on Facebook
Ann & Chris.
Error: Contact form not found.
Views: 109
-
Planting plans made easy to use at home!
It’s been 40 years since I first grappled with a traditional planting plan. All those lovely latin names – like Fagus sylvatica, Fritillaria meleagris, etc.,
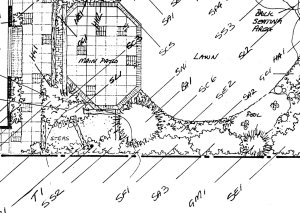
In the drawing office, it was a matter of using a thick graph paper so the electric eraser didn’t make lots of little holes in the paper as we repositioned plants, or corrected the many mistakes or changes in mind. Sometimes we used a plant stamp, then labelled by hand. As you can see interpreting the labels isn’t easy.
The whole process was time consuming, difficult to make into a quality finished drawing.
This next version once CAD was introcuded is a combination of hand drawn and CAD drawn, easier to interpret, but still not easy to set out.

Using CAD system On site, in those days these were cumbersome beasts, usually printed on dyeline, so it was dark, difficult to read with scribblings and such in the margin, fragile, and ruined once wet. Wrapping in plastic sort of helped, cutting into smaller sections then laminating was better..

Wielding one of these around on a damp morning picking out the plants, with the planting foreman, and then placing took for ever.

Trying to mark off those plants you had placed and then moving on to the next batch, with a few areas missing….
For some odd reason even though the nursery managed to price all the plants, they never seemed to be able to deliver them all to site completely in one go, or even to the company yard, so the whole process was both time consuming, expensive and worse annoying to a client who by now had had enough of three or five members of staff working in what was their space.
I hear a gentle nod of agreement or perhaps sigh of frustration?
It got so bad that we used to change our standard estimate to something like..
” To carefully prepare ground, incorporating peat and fertilizer at each planting station, to supply & plant in ‘xxx’ number of flowering & ornamental shrubs, carefully watering in on completion, then applying a 50 mm depth of planting mulch”
Here’s a plan without specifics..in this case a veggie garden area.

This gave us a contractual escape clause, but wasn’t what we wanted to portray to our clients. We even tried to restrict the planting selection to plants we knew we could obtain, but designers & clients have pet likes and dislikes being restrained to just a few varieties caused all manner of objections!
We even tried an even more generic look – with areas just designated for planting.

We also found most of our clients actually really wanted to do some of the work themselves, the idea of planting was often the most appealing, as the ground was prepared, the turf laid and all the ‘hard’ structural stuff was completed. The feeling was that just a bit of planting wouldn’t take long and they could then say ‘we did this ourselves’….
There was one small issue, understanding the ubiquitous planting plan. Setting out plants in the damp, with a tape, scale rule and a large piece of paper was a task best left to the experts.
We solved this problem with our Weekend Planting Grid. A really easy to understand ‘garden bedding system’. Today we even have this simple system patented, it’s even incorporated into one of the more easy to use CAD programs.

The system cuts setting out times in half, for anyone, acts as a landscape fabric or paper mulch, reducing weeds and watering and makes the whole process as easy as 1,2,3 ! – costing only marginally more than just a landscape fabric.mulch.
No longer do you need a setting out plan, just a plant position is all that is required.

It makes it very easy to place the plants in position, so now any combination of annual, bulb, corm, perennial, shrub, even tree can be used with little risk of them being placed incorrectly. In fact there is no need for a planting plan at all ! Just a series of grids will do. The fabric is left to act as a landscape mulch mat, preserving water and reducing weeds, all it requires is a 2 inch layer of mulch to keep attractive.

If you use the CAD program you can design your own arrangement , create them with photorealistic images and then print out their positions. The CAD program automatically generates the grid layouts, positions the plants, prints out a planting position list, even prints out a plant label with position for the plant pots, then generates a quotation and plant care notes – amazing really !
Difficult to set out designs are now easy…

Complicated Herb and Veggie gardens are a breeze. With positions shown on a simple patented grid system.

Even more fun is the simple PicaGardi that you can download and use it’s available on the iTunes store, Google Play and Amazon
We are planning a Growing Trends radio show just about design and designers soon, we would love to hear your comments, suggestions & ideas.
Ann & Chris
Error: Contact form not found.
Views: 72
-
Those Opps! moments, never Assume !
Today you can chuckle at my expense !!!

Designing & Building award winning landscapes has been a very rewarding, satisfying, fun filled occupation, of course there have been days one prefers to have skipped or passed by, yet more where looking back it was quite amusing now – I’m sure you too have a few you could share with the growing readers too.
So Ann and Chris are making you an offer you cannot refuse? – well perhaps you can !

Here is the challenge. If you have an amusing enough incident and you share it here by way of a comment,
Ann & I will call you ( we will have to keep this to an English conversation for now) , we will give you at least 5 minutes to describe in your own words the Opps! moment, you may also give your business a gentle plug!
Hows that ?
So let’s get the ball rolling with some of those Opps ! or “Out take” moments that have happened to me.
“Hook – Up”
The first that I remember wasn’t actually related to horticulture it was whilst working during a summer recess from college, working as a summer assistant lock keeper,on the River Thames at Mapledurham, which I think is in Oxfordshire, as I recall a quite well known movie was being filmed at the time called “The Eagle has Landed”, just across the reach from the lock.

On this particular day, there was lots of action and noise from the film set, lots of tourist and regular cruisers plying up and down the Thames. The lock is quite large – from memory nearly 200 ft long and about 16ft wide with a 5 ft rise and fall. Because we were busy we were packing in the boats. Anyway, having filled the lock with boats I opened the sluice gates to let the water out and let the lock water level fall around 5 ft, as this happened I was distracted by the filming. the next minute I turned to see all the boats hooked up with no water beneath! … not a good position to be in !
It took some time to undo the resultant mess….
“Splash”

Client Pool Sticking to water… one night I was making a visit to a potential client on the way home, it was around dusk, the home owner was a banker, they had a lovely home in Chislehurst, Kent. After a brief talk we took a short stroll around the garden as dusk was fading, it was a long time but it was quite dark by the time we headed back to the house.
For some reason, I was talking to the client side by side one moment and the next I was treading muddy water, tearing though a rather decrepit swimming pool cover having missed the dog leg steps on the poolside.
The water soon reached my waste, and my suit took on a rather unusual color and smell..meanwhile the client rushed indoors exclaiming I had fallen into the pool, which brought the whole family out giggling !.. somewhat soaking I drove the last 15 miles home. We ended up completing the project, one of the requirements was to break out the miscreant swimming pool !
“Mud Slide”

On another occasion we were contracted to dredge a small lake and construct a weir. ( a pond is in my definition an area of water in which you can throw a stone over it to land on the other bank. A lake is where the stone falls into the water). So dredging a lake is a task, requiring a variety of big toys… in this case we arranged with the local waterways folks to block ( legitimately) the upper inflow channel, allowing the water in the lower lake to fall around 8-12 ft which would allow the use of a piece of equipment similar to a dragline.
Unfortunately, whilst we knew the plan, the water folks knew the plan and the parks department knew the plan, nobody had told the security guys – who “unblocked’ the upper lake outfall late in the night, thinking some vandal had blocked up the outfalls !
So after about two days of working we returned in the morning, to find the lake full of water , the equipment marooned 50 ft out in the lake,with their tracks buried and the mud slowly engulfing the cab.. some drastic action was needed, a very heavy lift truck was used to winch out the equipment, and we changed our method of removing the silt,to pumping the now slurry into a temporary lagoon to dry out before carting away.
“An up-lifting experience”
The next was a tad more mundane, well it started that way at least. We had just completed a large ‘cut & fill’ project covering many tens of acres on a setting out ground for a new power station, we were preparing one area of about 30 acres for seeding when suddenly the bomb squad pulled up, I kid you not…
Here is an English sapper exploring on the site !

Apparently they had been told that a lady across the way ( about 1/4mile, you can see the block in the distance) had just recalled a flight of German bombers had dropped their loads of bombs in the 2nd world war ,just where we were working some had failed to explode…

so they dug around for a few days, messing up our seed bed and left, when they failed to find any …..
Some ten years later, whilst preparing for the new Queen Elizabeth II, Dartford bridge, the said 15 or so unexploded bombs were indeed found in the hedge row not 70ft from where the bomb squad had poked around !!!
It was a very useful do not ASSUME moment … you know the meaning don’t Assume as it makes an “ASS out of U and ME”
Enjoy the week !
Ann & Chris
Views: 127